
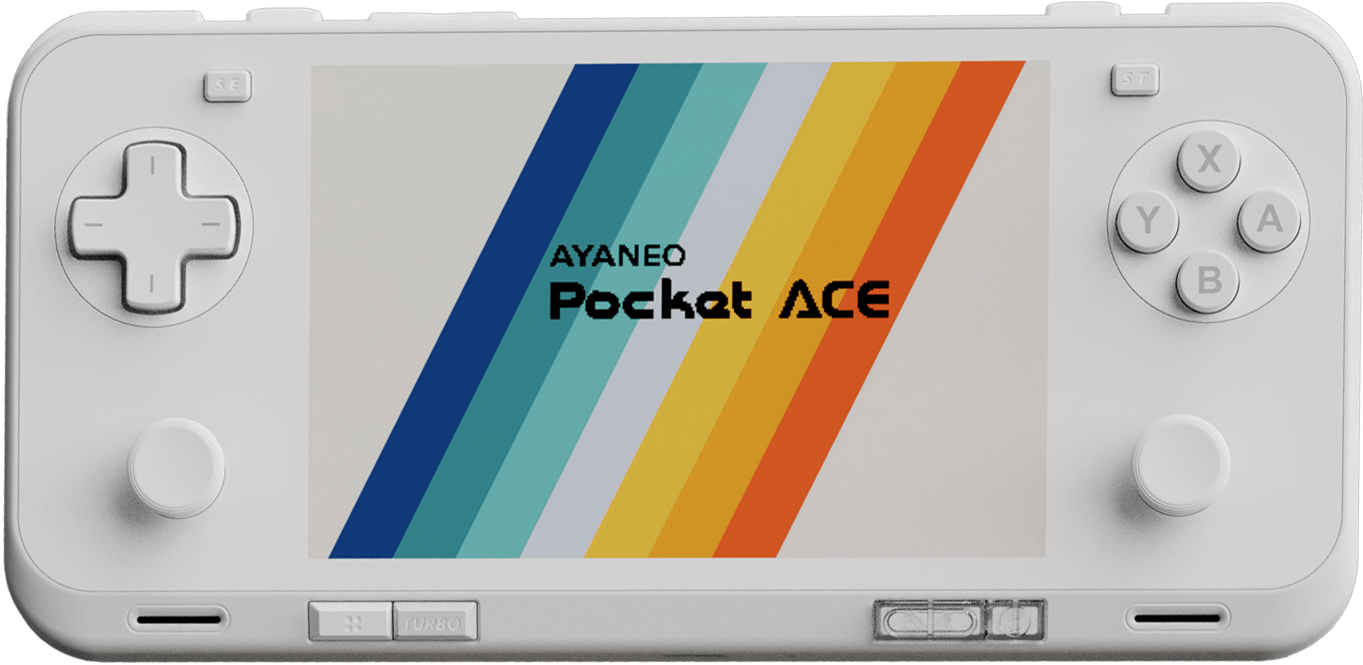
The AYANEO Pocket Ace is a premium device with a 3:2 aspect ratio, which makes it great for playing one of my favorite systems: the Game Boy Advance. While 4:3 aspect ratio devices are often considered the “gold standard” for playing retro games, devices with a 3:2 aspect ratio have a dedicated group of enthusiasts who play more than just GBA games on them. With a great screen and design, the Pocket Ace has several fans within the retro gaming community. This guide will help you set up your AYANEO Pocket Ace to get the most out of your device.
Table of Contents
AYANEO Pocket Ace Specs

The AYANEO Pocket Ace comes in three distinct colors (Snow White, Phantom Black, and that oh-so-fun Retro Power) along with four different RAM and storage configurations. While anything beyond the 8GB RAM configuration is complete overkill for GBA, many members of the retro gaming community have found themselves using the Pocket Ace as a streaming and PC gaming device. If this is your intended purpose as well, higher RAM and storage options will definitely help.
The Pocket Ace is rocking a Snapdragon G3X Gen 2 (basically a slightly overclocked 8 Gen 2), which is powering a 60Hz, 4.5-inch 1620×1080 LCD screen. If that size and aspect ratio sounds familiar, it should; this is the same screen found in the KT-R1, a device marred by quality control and shipping issues that had a notably gorgeous screen.
Note: Yes, the Pocket Ace is unavailable on the AYANEO website, what with AYANEO themselves discontinuing devices and raising prices in response to current market conditions brought on by the increasing price of memory and storage components. However, the Pocket Ace can still be found in several secondhand marketplaces, like the one over in the Retro Handhelds Discord.
| Specifications | |
|---|---|
| Hardware | |
| CPU | Qualcomm Snapdragon G3x Gen 2 |
| GPU | Qualcomm Adreno A32 |
| RAM | 8GB LPDDR5X, 12GB LPDDR5X, 16GB LPDDR5X |
| Cooling | Heat Dissipation Copper Plate + Fins , Cooling Fan |
| Display | |
| Screen Size | 4.5-inch |
| Resolution | 1620 x 1080 |
| Aspect Ratio | 3:2 |
| Refresh Rate | 60Hz |
| PPI | 433 PPI |
| Storage | |
| Internal Storage | 128GB UFS 3.1, 256GB UFS 4.0, 512GB UFS 4.0, 1TB UFS 4.0 |
| External Storage | microSD |
| Battery | |
| Battery Capacity | 6000mAh |
| Charging Speed | 40W PD |
| Connectivity | |
| Wi-Fi | Wi-Fi 6 |
| Bluetooth | Bluetooth 5.3 |
| Cellular | ❌ |
| Ports | USB-C |
| Video Out | Yes |
| Controls | |
| Sticks | Hall Effect |
| Triggers | Hall Effect |
| Shoulder Layout | Stacked |
| D-Pad | Top Left |
| Audio | |
| Speakers | Stereo |
| Speaker Location | Front-facing |
| Audio Notes | Surge Linear Vibration Motor, SoundTAPMagic Sound Vibration |
| Physical | |
| Dimensions | 176 x 82.5 x 18.4mm |
| Weight | 310g |
| Form Factor | Horizontal |
| Software | |
| Operating System | Android |
Recommended Accessories
When it comes to official accessories available directly from the AYANEO website, there are several options. We’ve got a storage bag, screen protector, and various stick replacement caps. We’ve also got a protective grip that I cannot recommend enough. Just try to get it in the same color as your actual device.

- Pocket Ace Storage Bag
- Pocket Ace Screen Protector
- Large Joystick Replacement Caps
- Thumbstick Caps
- Pocket Ace Protective Case/Grip
When it comes to unofficial accessories, there are a couple of options for 3D-printed cases and covers on Etsy. As a reminder, if you’ve got any larger replacement sticks or caps for your AYN Odin or Retroid Pocket devices, the Pocket Ace uses the same stem as those devices.
- Pocket Ace Slim Grip
- Pocket Ace Thick Grip
- Pocket Ace Grip/Travel Cover
- Hype Stix Replacement Thumbsticks
External Storage
Ah, the age-old question of whether to keep your games and files on the internal storage on the device itself, or external storage in the form of a microSD card or portable SSD? External storage is great for ease of transferring files to and from your device. All my files are kept on a Sharge Disk (external 2230 SSD enclosure), which means I don’t have to constantly involve my computer in the installation process. I can even play games directly from the SSD!
Internal storage is going to be faster and more stable, so plenty of people prefer that option. However, if you’re interested in something like PC emulation through GameNative or GameHub, then you might want to reserve that internal storage for those purposes, as using external storage for PC emulation on Android can cause performance issues and/or crashes.
Installing Apps and Emulators
Now, it’s time to focus on getting your emulators set up. Remember when we had to find and install each emulator and system separately? Retro Handhelds remembers. Those days are long gone, unless you prefer that sort of journey.

Something to keep in mind: since the AYANEO Pocket Ace has a 3:2 aspect ratio, any of your consoles that natively display in 4:3 (PlayStation 2, GameCube, N64) will have vertical black bars on either side of the game, while consoles that display in 16:9 (Nintendo Wii, PlayStation Portable) will have horizontal black bars along the top and bottom of the game. Also know that some emulators have widescreen hacks for 4:3 consoles to display at 16:9, and some 4:3 consoles had games that had native support for 16:9 display.
If you want to know which console has what aspect ratio, Joey’s Retro Handhelds has a great guide.
Obtainium

Obtainium has made emulation and gaming software installation on Android an extremely simple process, with the help of the Obtainium Emulation Pack. Obtainium will provide links directly to developer sources and pages, cutting out the need to find and manage them yourself. Additionally, Obtainium will also keep tabs on these programs and alert you of any updates that need to be installed.
For an in-depth guide on Obtainium setup and configuration, please check out our Obtainium guide on our website.
BIOS Files

While the installation of emulators on your various handhelds will get you most of the way to your goal of playing games, some systems (most notably disc-based) require a BIOS in order to actually run the games or the original boot animations. Systems on RetroArch will be mostly covered, but anything additional (PS2, GameCube, Saturn, Switch) will require some additional file placements.
While copyright law keeps us from telling you where to find these files, you can refer to our Recommended BIOS Files article for examples of BIOS files for each system, along with where they should be placed in your file structure.
Choosing a Launcher or Frontend
Choosing a launcher or frontend ultimately comes down to preference. There are several options to choose from, including the AYASPACE launcher built into the AYANEO Pocket Ace, but it might be best to try a few different options and see what works best for your needs.
Beacon Game Launcher
My personal choice for frontend goes to Beacon Game Launcher. While it is a paid app ($2.99), which might turn some people off, it has been the one I consistently install on nearly all my devices. Beacon Game Launcher focuses on a simple, no-fuss setup and configuration, and aesthetically has been my favorite of several options that I’ve explored.
AYASpace Launcher

While I don’t personally use or recommend the AYASpace Launcher, it works and provides an option to integrate other frontends and display game libraries. This one feels a bit more DIY than simply choosing a frontend and launching games from that, so know going in that you may be doing a bit more tinkering if you choose this option.
Additional Options
- Daijisho (Free)
- Console Launcher (Free, with optional premium feature support)
- Launchbox (Free version supports up to 100 games. Additional paid packages available)
- Pegasus (Free/Open-source)
- ES-DE ($6.50 on Galaxy Store, Free for Patreon supporters)
Streaming Apps

This is going to depend entirely on your personal desktop/gaming PC and your home network, but the one that works the best for me is Artemis. Install Apollo on your streaming PC, and Artemis on your AYANEO Pocket Ace, and follow this guide from Retro Game Corps to get things running.
Moonlight/Sunshine is also an option, of which Apollo and Artemis are forks, and may work better for you depending on your home network situation. I just prefer and have had better experiences with Apollo and Artemis.
I’ve seen a surprising amount of community members in the Retro Handhelds Discord really enjoy streaming PC games on the Pocket Ace, so if that is something that interests you, don’t be afraid to give it a try!
PC Emulation

If you followed the previous Obtainium section, you’ll have access to both GameHub Lite and GameNative. These are the two biggest apps in the Android PC Emulation space right now. GameNative, which is my preferred PC emulator, gives you access to your entire Steam library, including cloud saves. Our own Jim has an excellent How to Play Steam Games on Android guide if you want to set up GameNative.
Some people have more success with some games in GameHub Lite than GameNative, and vice versa, so feel free to download both and play around to see what works for you.
Additional Recommended Apps
RetroAchievements is a completely community-driven way to earn achievements in retro video games, essentially giving a modern feel to our games of the past. While they can be a little divisive given their need for an always-online connection, it is a fun way to add a little extra layer of engagement to your gaming.
CHDroid allows you to convert ROM files into a compressed .chd format on the AYANEO Pocket Ace itself. Most disc-based games, like PS2, Sega Saturn, Dreamcast, and PC Engine CD, can be converted to .chd and save a ton of space.
Quick Tips and Tricks
Pocket Ace Buttons

The Pocket Ace has two function buttons near the left and right shoulder buttons (RC and LC) along the top, along with the volume +/- and Power button. We’ve got the Start button at the top-right of the screen, and the Select buttons at the top-left of the screen.
The Display button and Turbo button can be found underneath the screen on the bottom-left, while the AYANEO “M” button and Back button can be found underneath the screen at the bottom-right. What’s a bit unique about these last two is that they’re transparent on the Pocket Ace, matching the color of the device itself (or transparent red on the Retro Power). It’s an odd choice that is certainly eye-catching.
The power button also has a fingerprint sensor, which I enjoy.
AYANEO Menu

Clicking on the AYANEO button will bring up a menu, where you get a mix of monitoring and performance panels and quick-hit settings and adjustments.
AYANEO Menu Settings
- Performance
- Performance Selection
- Eco
- Balanced
- Streaming
- Gaming
- Max
- FPS Monitor
- CPU Temperature and Usage Percentage
- GPU Temperature and Usage Percentage
- Fan Speed
- Fan Mode
- Off
- Low
- High
- Full
- Custom
- Performance Overlay Toggle (shows minimized metrics on top screen)
- Performance Selection
- Controller
- Key Mapping toggle
- Vibration Adjustment
- Off
- Low
- Middle
- High
- Sound Vibration toggle
- Button Vibration toggle
- Trigger Adjustment
- Digital
- Linear
- Sensitivity Adjustment
- Joystick Adjustment
- Sensitivity Adjustment
- Invert Joystick
- Dead Zone toggle
- ABXY Layout
- Standard (Xbox)
- Japanese (Nintendo)
- Select/Start Turbo Mapping
- Gyroscope Aiming Toggle
- Turbo Button Mapping
- Device
- Brightness Adjustment
- Volume Adjustment
- Airplane Mode toggle
- Bluetooth Toggle
- Wi-Fi toggle
- Toggle
- Screenshot
- Bluetooth
- Force Landscape
- Auto-Rotate
- Do Not Disturb
- Airplane Mode
- Screen Recording
- Alarm
- Screen Casting
- Location
- Hotspot
- Data Saver
- Dark Mode
- Wi-Fi
- Settings
- Check for Updates
- Device Settings
- Android System Settings
How to Update Your AYANEO Pocket Ace
To update the software on your AYANEO Pocket Ace, follow these steps:
- Go to your AYANEO System Settings (steps found below)
- Find the System Update
- Any applicable programs that need to be updated will have a red Update icon next to them
- Once you select Update, a percentage icon will appear in red, showing progress
- Once updated, you will likely be booted from the AYANEO System Settings
- Return to the AYANE System Settings to update any subsequent programs
- Once all programs are updated, a No Updates Available message will appear
AYANEO System Settings

Clicking on the AYASetting icon (it looks like the regular Settings icon, they just threw “AYA” in there) will bring up the AYANEO System Settings. For anyone who’s had an AYANEO device before, you’re likely going to recognize these screens.
System Settings
- Account
- Log in to your AYANEO Account
- Sync Game Library toggle
- Sync Screenshot toggle
- Performance
- Adjust performance modes
- Adjust fan modes
- Adjust CPU scheduling modes
- Adjust CPU limit
- Adjust GPU limit
- Lock GPU at max frequency
- Controller
- Joystick calibration
- Set Custom Button layouts
- Adjust controller mode
- Adjust keyboard and mouse mode
- Setup custom keys (useful for those LC and RC function buttons near the shoulder buttons)
- Device
- Root script
- Device spoofing
- Screen Settings
- Virtual Memory Management
- Fan Settings
- Casting Settings
- Turn off Wi-Fi while screen is off
- Charging fan speed when screen is off
- Equalizer
- Custom
- Adjust system wallpaper
- Performance mode prompt
- Confirm before returning to desktop
- General
- System language
- Input Method
- Server
- All Settings
- System Update
- About
- Device Name
- Serial Number
- Device Storage
- RAM
- Android Version
- Version Code
- App versions of the various AYANEO software
- Legal information and third-party libraries
File Transfer: Solid Explorer

My go-to file transfer program has been Solid Explorer for a long time now. I enjoy the split-screen layout and the ease of copying and moving files. It is worth mentioning that this is a paid app ($5.99, though there is a 14-day free trial), but I’ve simply been unable to go back to other options after using Solid Explorer.
If you prefer a free option, MiXplorer is one that my colleague Nick has recommended before. It’s free, with a premium version called MiX Silver available, and it also works very well.
The Ultimate Game Boy Advance Setup

I already mentioned it up top, but the AYANEO Pocket Ace might be my favorite device for playing Game Boy Advance games. That screen is awesome, the 3:2 aspect ratio is perfect for GBA, and the smaller size and build quality of the device make you want to actually pick it up and play.
In fact, I only use my Pocket Ace for playing GBA games. However, when talking to members of the Retro Handhelds community, most people don’t underutilize their expensive devices like me, and so a GBA-focused build doesn’t make for a very interesting or wide-reaching setup guide to the greater community.
Therefore, I decided to dedicate a section of this guide to all things GBA as it relates to the Pocket Ace!
Emulators

If you’re going to want to take advantage of the shaders, filters, and overlays mentioned below, then you’re going to want to use RetroArch. If you’re using RetroArch, then mGBA is the way to go; gpSP is also a core option for GBA, but mGBA is more stable. RetroArch is one of the emulation options available in the Obtainium Emulation Pack we mentioned previously.
Inside RetroArch, you can find mGBA under [Main Menu > Load Core > Download a Core > Nintendo – Game Boy Advance (mGBA)]. Just tap on the core to install.
If you’re not using RetroArch, Pizza Boy and My Boy! are also options I’ve seen recommended.
Shaders, Filters, and Overlays
Shaders, Filters, and Overlays are methods that we can use to modify the way the emulator is displaying the game, in order to make it look even more like we remember playing it back in the day. This includes changing colors and saturation, adding scanlines and pixelation, or adding overlays to make the image curve like an old CRT television.
I will be covering things specifically for GBA and noting the best options for the AYANEO Pocket Ace. If you want to get a little more granular or look at these options for other systems, Retro Game Corps has an excellent guide on Shaders and Overlays. Give it a read!
Filters

Filters are where the more powerful chip in the Pocket Ace might actually be worth the squeeze for GBA. Since filters are CPU-intensive, the SD G3X Gen 2 can handle anything you try to throw at it. These are also rarely compatible with shaders, so it’s best to use these for a quick, simple glow-up for the game. These can be found in RetroArch > Settings > Video > Video Filter > select a filter.
There are several options for filters, but my favorites for GBA can be found below:
- Grid2x.filt
- Grid3x.filt
- Scanline2x.filt
Shaders

Shaders are basically filters that use the GPU instead of the CPU. Since the Pocket Ace is again so overpowered with that Adreno A32, we can take advantage of the more powerful SLANG shaders here. These can be found in RetroArch > Settings > Video > Output > Video > vulkan. Make sure you save your current configuration ( Main Menu > Configuration File > Save Current Configuration), then exit RetroArch.
Go back into RetroArch > Main Menu > Online Updater > Update Slang Shaders. Load up a GBA game > Quick Menu > Shaders > Video Shaders ON > Load Preset > shaders_slang > select a shader. Once you find a shader you like, you can go back into the Quick Menu > Shaders > Manage Presets > Save Core Preset, which will save the shader for the entire mGBA core. You can adjust certain parameters of the shader via Quick Menu > Shaders > Shader Parameters.
There are several options for shaders, but my favorites for GBA can be found below:
- handheld/lcd3x (this is the one I see most commonly used and recommended)
- handheld/lcd-grid-v2
- handheld/zfast-lcd
- handheld/gameboy-advance-dot-matrix
- handheld/simpletex_lcd
- handheld/color-mod/gba-color
Overlays

Overlays most often provide bezels that mimic original hardware screen borders in order to hide black bars or provide more aggressive scanline/gridline effects that can be placed on top of your shader or filter. I don’t personally use overlays and don’t really find them that useful for GBA, but there are many who do. To find these, open up a GBA game in RetroArch > Quick Menu > On-Screen Overlay > Display Overlay On or Off > Overlay Preset > select an overlay.
Integer Scaling

Integer Scaling is a way to give crisp, even pixels when scaling a game from the original hardware’s aspect ratio (240×160 for GBA) to one that matches the resolution of your device. Given that the Pocket Ace has a resolution of 1620×1080, you’re not going to get pixel-perfect integer scaling without some black bars being involved. I prefer to leave integer scaling off, but 5x or 6x will work for the Pocket Ace to ensure sharp, even pixels. Enabling or disabling integer scaling is as simple as going into RetroArch > Settings > Video > Scaling > Integer Scale > On or Off.
Color Correction

Color Correction is a way to desaturate the look of a game on an emulator. GBA emulation often oversaturates colors on the device, so some people prefer to use color correction to make them closer to what they would look like on actual hardware. I personally find this makes the game look too dull, but it’s an option many prefer. This can be found in RetroArch when a GBA game is open > Quick Menu > Core Options > Video > Color Correction > Game Boy Advance.
Personal Favorite

I’m a simple person; I use the handheld/dot shader, with the dot shine set to 0.17 in the shader parameters. No overlays, no integer scaling, and no color correction. It desaturates the colors just a bit, without making them seem too dull, and provides a dotted LCD screen look. It’s uncomplicated, and it makes me happy.
Conclusion
The AYANEO Pocket Ace is an excellent device for playing GBA games, though it is a little pricey and a bit overkill for just that purpose. However, if you do choose to get one, know that it has the capabilities to do so much more. Hopefully, this guide provided you with the tools necessary to enjoy your Pocket Ace to the fullest, and we will continue to update this guide with more fun updates and projects as we come across them.