
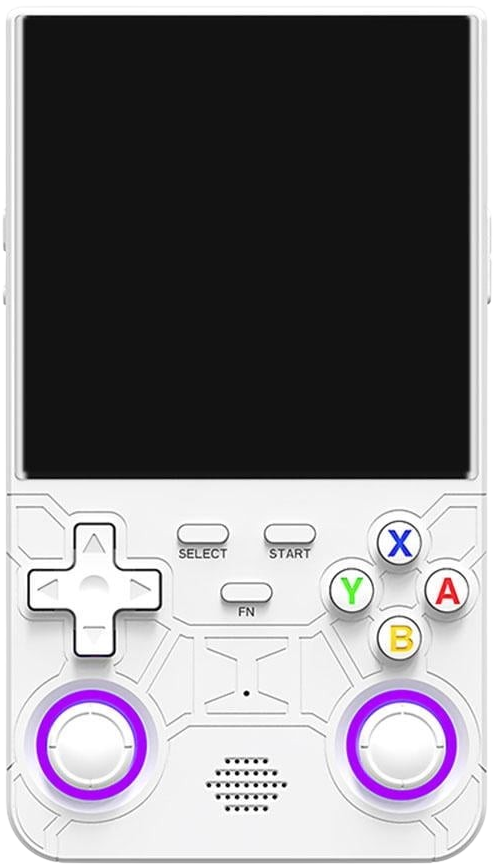
As the resident e-waste guy that shares a home with way too many handheld emulation systems, I’m always on the lookout for fun projects to push these noble little machines into fun new territory. Turning the R36 Ultra into a battery-powered Ubuntu PC certainly fits the bill.
Clearing the air before we dive into the meat of things. Is this project practical in any real way? Not really. Is it cool as hell that it’s available anyway? Absolutely. If you don’t mind a little back-alley Telegram downloading and some terminal tweaking, you can check it out, too.
Finding the Files
So, in order to avoid compiling your own OS .img, you’ll want to grab the one available over on the R36 Ultra Telegram. This channel is the only place I was able to locate the files being hosted at this time.
Developer Maleficent_Key4151 has provided the files inside the @r36ultra channel. There are three archives that you will need to download that can be found pinned on the main section of the channel: sdd_part_aa, sdd_part_ab, and sdd_part_ac.

Make sure you’re grabbing all three archives. I missed the first one on my initial viewing and then wondered why the archive wouldn’t extract properly. Don’t be dumb like me. Good rule to live by.
Stitching the Frankenstein-ed Img Back Together
The files downloaded from the R36 Ultra Telegram lack any file extension and just have names like ‘sdd_part_ab’ and ‘sdd_part_ac’. Don’t panic—a quick trip to the Linux terminal or Windows PowerShell will stitch your Frankenstein monster back together.

- Navigate to the directory where you downloaded the archive files from Telegram.
- For Windows Users: Open PowerShell in the folder and run: copy /b sdd_part_aa + sdd_part_ab + sdd_part_ac r36_ultra_ubuntu.img.xz
Note: The /b is vital—it tells Windows this is a binary file. Without it, your image will be dead on arrival.
- Give the command a few seconds to do its thing. You should be greeted by a new blank terminal line, and the newly built r36_ultra_final.img.xz file will be in the directory with your downloaded archives.

- From the newly formed r36_ultra_ubuntu.img.xz, use the archive software of your choice (Winzip, WinRAR, PeaZip, etc) to extract the .img file from the .img.xz archive.

- Insert your blank micro-SD into your PC’s SD reader.
- Load the newly extracted .img into your writing software of choice (Balena Etcher, etc). For this go-round, I burned with USB Image Writer.

Select the recently extracted r36_ultra_final.img as the file to burn and your SD card as the place to write it.
First Boot
- Eject the newly written SD card from your PC and insert it back into the 36 Ultra console.
- You should see a splash screen for drgnwrkOS to confirm that the install process is underway.

- After the install screen, you’ll be greeted with an empty wallpaper backdrop and a taskbar with one item. That’s your terminal. You did it.
Now, from here on out, the device controls are essentially null. You have to plug in an external mouse/keyboard to do anything within the environment.

A USB-C adapter and a cheap AliExpress combo remote worked a treat. Thankfully, the R36 Ultra already has an internal WiFi chip, so the full tower of power wasn’t necessary.
Proof of Life

Before we can venture off into exploring projects in the unknown, we have to make sure that our new R36 PC can talk to the outside world.
- Using the mouse, open the terminal window from the taskbar
- To check the status of the device in the terminal, type: nmcli device
- To scan for available WiFi networks, type: nmcli device wifi list
- Connect to your home WiFi network with command: sudo nmcli dev wifi connect “YOUR_SSID” password “YOUR_PASSWORD”
- See if you can talk to the outside world by pinging Google: ping -c 4 google.com
Congrats! You have yourself a Linux terminal handheld. Let your imagination guide you to what might come next.
Lessons Learned
So this project isn’t going to be for most users. This is strictly something that I thought was cool, and it’s a testament to the madness and talent of the handheld development community. I was expecting something a little closer to a traditional Ubuntu desktop, but I realize that thought might have been ambitious given the hardware constraints.

As far as actual applications go, it’s up to you to get creative. You could turn the R36 Ultra from a gaming handheld to a standalone Pi-hole for your home network. Maybe you want to beef up the storage capacity via SD and turn the handheld into a portable file or media server running a lightweight version of something like Jellyfin. As long as it fits within the boundaries of Ubuntu and the machine’s hardware limits, you should be able to take a crack at it.
Unless you’ve got your heart set on a specific application, I might wait for this project to mature a little more to include things like analog stick mouse control or a virtual keyboard. This project has mostly been completed with the same goal as most of my tech projects. I don’t really need it, but it’s nice to know I have it available should I need to turn a handheld into a portable Linux PC in the future. Call it peace of mind…..maybe with a dash of insanity. ‘Till next time.
3 Comments
I advice you to contact: HENRYCLARKETHICALHACKER AT G MAIL COM he is good in hacking into any database, delete record, improve credit score, spy on whats-app, text, phone, emails, as long as it’s hack he is great, you won’t be disappointed, cheap and fast, he saved my relationship
for hacking
+16193655641
I suspected my husband of cheating on me, and I reached Henryclarkethicalhacker @ gmail. com , and he helped me discover the truth. I could monitor his phone remotely without touching it, making the process easier and less time-consuming. The step-by-step guide was also very helpful, showing me exactly what I needed to do