If you are like me, then when you get a new device you are instantly interested in what custom firmware is available that can make the experience even better than dealing with the stock firmware. The RG35XX Plus and RG35XX H are the newest installments from Anernic. I have always heard great things about MinUI for its simplicity and ease of use for non-tinkerers. MinUI is still in the beta process for these devices, but it is still working great and a big improvement from stock firmware in my opinion. I decided to write a short guide for anyone looking to install this to their device while I ventured on this journey myself. If you are more of a visual learner, Zu did a great video on this process:
Materials Needed:
2 Micro SD cards
SD Card Reader
Computer or Laptop
An Unzipping Program Like WinRAR, 7-Zip, or PeaZip
Step 1) Download MinUI
Head over to Shaun Inman’s MinUI Github here. The latest release will be at the top and as of this writing, the newest version is MinUI-20240120b-1. Under assets, download both MinUI-20240120b-1-base.zip and MinUI-20240120b-1-extras.zip to a location of your choice.
The 2 files needed located on the GitHub
Step 2) Prepare Your SD Cards
Like most Anbernic devices, the RG35XX Plus and RG35XXH use 2 micro SD card slots. The size for the first SD card does not have to be very large because this is going to house the firmware. I would suggest a 16 GB or 32 GB SD card that is a reputable brand. For the second SD card, I would suggest something larger because this is the card you are going to be putting your games on. I will call these SD Card 1 for the Custom Firmware and SD Card 2 for the games directory.
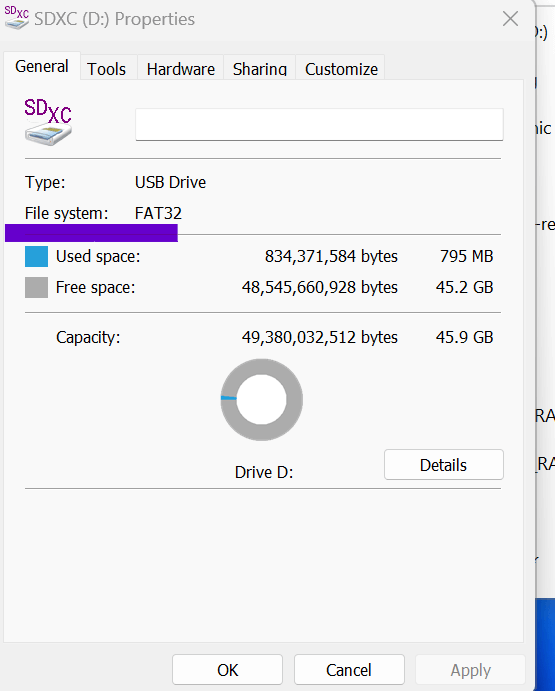
The CFW SD card used need to be formatted at FAT32 and the other can be exFAT or FAT32. Right-click on the card when it is inserted and select “Properties”. Beside File system, it will tell you what it is formatted in. If it is not already in FAT32, you need to use a formatting tool like SD Card Formatter to reformat it to the correct format.

Where to locate if your SD card is FAT32
SD card 1 needs to have the same structure as the SD card that comes with your device. You can even just use the same one that came with the device, but it is said they are prone to failing more easily than a reputable brand, but also your results may vary as well. If you are using a new SD card, copy all of the original files from the card that came with the device onto your computer and then paste them onto the new card you will be using. If you are just using the original card, skip this step as it is already done.
Step 3) Adding the Correct Files
Insert SD Card 1 into your computer. Now go to where you downloaded those 2 files from the GitHub page. Right-click MinUI-20240120b-1-base.zip and extract it. Locate the folder rg35xxplus and open it. Inside this folder is a file called dmenu.bin. You need to copy this file to the base of your SD Card 1. After this, you are finished for now with SD Card 1 so you can put it back into the TF1 slot of your device.
Insert SD Card 2 into your computer. Within the unzipped MinUI-20240120b-1-base.zip, there is another zipped file that just says MinUI. Keep this zipped! Now just copy that still zipped folder onto the base of SD Card 2. When this is finished, insert the SD card into the TF 2 slot of your device.
Make sure to copy the Roms and Bios folder from the MinUI-20240525-0-base.zip file to sd card 2z
Step 4) Installing the CFW
Now with both of those SD cards inserted into your device, turn it on. Upon turning it on, you will see it say that it is installing MinUI on your device. Leave it be as it installs the custom firmware to your device. When it is finished, turn back on your device and you will now have MinUI!
Step 5) Adding Games
Put SD Card 2 back into your computer. You will now see there are directories that weren’t there before. Now you can add your legally backed-up games onto your device. Open the folder that says “ROMs”. Here will have all of the systems that you can add games to. Just copy and paste your games into the correct folder. FC stands for Famicom and is where your NES games would go. SFC stands for Super Famicom and this is where your SNES games will go. Once you are finished, plug your SD card back into your device.
Step 6) Optional Extras
Remember when we also downloaded MinUI-20240120b-1-extras.zip at the beginning? This contains extra systems and emulators that are not required, but you may want these to be added to your device. These systems are Neo Geo Pocket (and Color), Pico-8, Pokemon mini, Sega Game Gear, Sega Master System, Super Game Boy, TurboGrafx-16 (and TurboGrafx-CD), and Virtual Boy. Of course, I wanted these extra systems and I am sure you do too.
Insert SD Card 2 back into your computer. Now go locate where you put the MinUI-20240120b-1-extras.zip. Just like before, you are going to unzip this file. You are going to take all the contents of that file (Bios, Emus, Saves, Tools, Roms) and copy it to the base of the SD card you just inserted. Once this is finished, you can insert this back into your device and power it on.
Now just like before, you will have more folders to put your games into.
Believe it or not, you are finished! If you would like to update this firmware, it is as simple as downloading it and copying the new MinUI.zip to your SD Card 2. Now let’s look at some of the features included with this custom firmware.
Overview
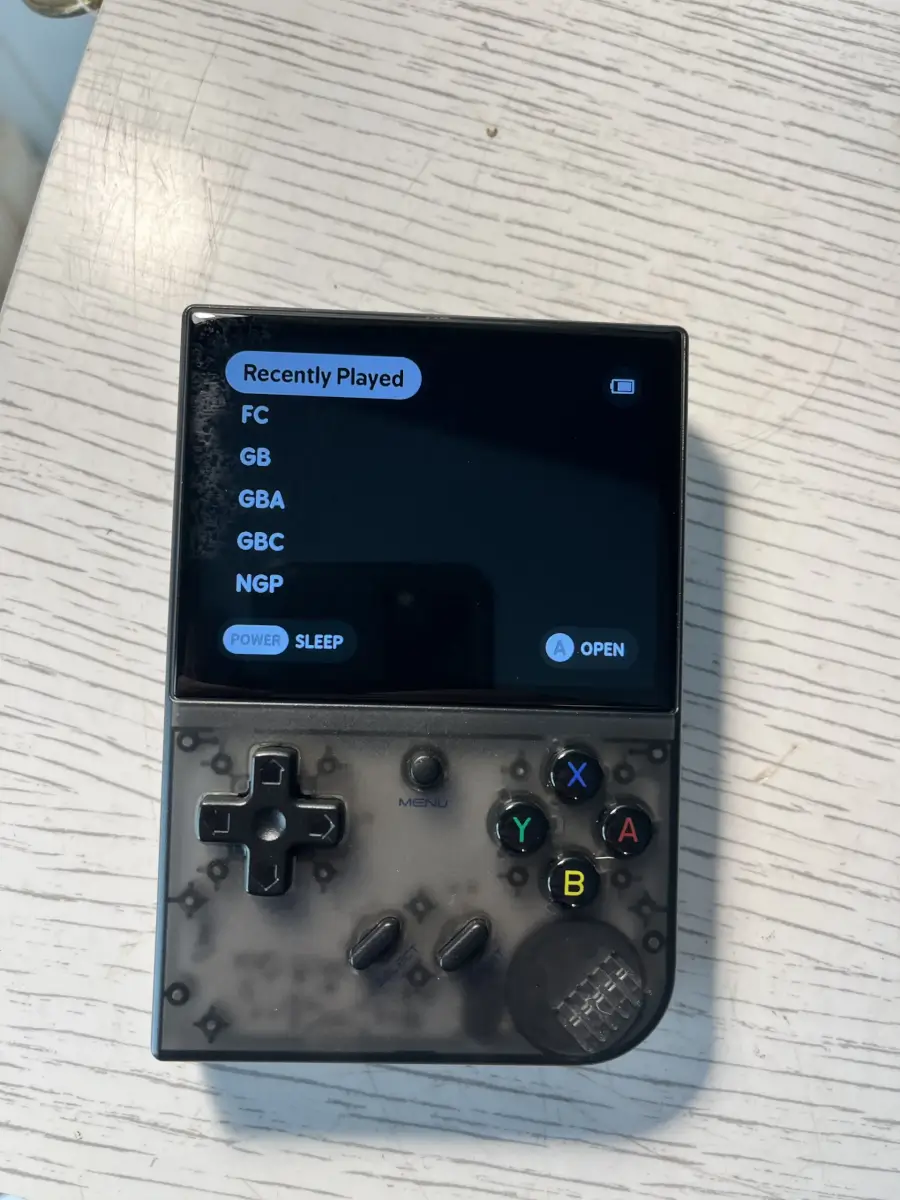
First, I enjoy how much it resembles the Analogue Pocket interface. It is very simple and not busy. There isn’t box art distracting me from just picking a game and playing it. There are no big menus or settings in the open either. If you want to increase or decrease the brightness, hold the middle function button while pressing the volume buttons. That is all the tinkering to do on the main menu.

MinUI Menu on RG35XX+
After selecting the system you want to play, you can now see a list of all your games. When you pick a game, you can now press the function button and have more options. There is continue, save, load, options, and quit. Within the options menu, you can change things like screen size, filters, and hotkeys. You can save these on a per-game or per-system basis. This makes tinkering way easier than it has been for me on other devices. You may miss boxart and wifi with this firmware, but for a more minimalist look this is your winner.
I hope the guide was able to help you out on getting MinUI installed on your new RG35XX Plus or RG35XXH and now you can enjoy them even more! The RG35XX Plus is my first Anbernic device since the RG351V and I can already tell I am going to be enjoying it. Get your own RG35XX Plus here on Amazon to get that sweet, sweet fast shipping. More interested in the RG35XXH? Here is a link to get one of those on Amazon as well! If you would like to order from the Anbernic official store.
Not sure if you want the Anbernic RG35XX Plus or RG35XX H? Check out Raven’s article on the RG35XX+ here or his RG35XX H article here. Want a comparison? Ban has you covered with his article here.
What did you think of this article? Let us know in the comments below, and chat with us in our Discord!
This page may contain affiliate links, by purchasing something through a link, Retro Handhelds may earn a small commission on the sale at no additional cost to you.

Hello and thank you for this tutorial !
I have a question, if I have the version with only one SD card and if I don’t want to have two SD Card, can I put the ROMS on the SD card 1 with the firmware ?
And I heard that part of the system was a linux partition on the SD card, there is nothing to do other than format to FAt32? no linux partition to integrate? I’m French, sorry if my English is bad 😅 thank you
C’est pas grave! I believe you can put the roms on the same card. I haven’t tried myself on that, but maybe you can reach out on our discord in the rg35xx and we can find you some help if it doesn’t work!
Thanks , I’ll joint the discord 👍🏻
Hello, I have 2 SD cards but I have a question about this : “If you are using a new SD card, copy all of the original files from the card that came with the device onto your computer and then paste them onto the new card you will be using”
What files/folders should I copy? Since the original card is 64 GB in size, I can’t copy everything to my new SD card? Thank you for your help.
Hey! I am not too sure which ones are absolutely needed as I would just copy everything. You could probably keep out any roms or games on the original
What a horribly written guide that doesn’t work at all
Sorry it didn’t work for you. It’s worked for other people, so maybe worth trying again or watching the video too.
Conversely, thanks for writing up this guide, it worked perfectly for me.