Greetings friends and fellow enthusiasts!
This is Mikhailov from Team Retrogue, where we like retro games and the devices that bring them to us.
In my younger days, I was in awe of the N64 Transfer Pak. Utilizing this controller attachment, one could plug in their Game Boy or Game Boy Color Pokémon games and connect to N64 titles Pokémon Stadium and Pokémon Stadium 2.
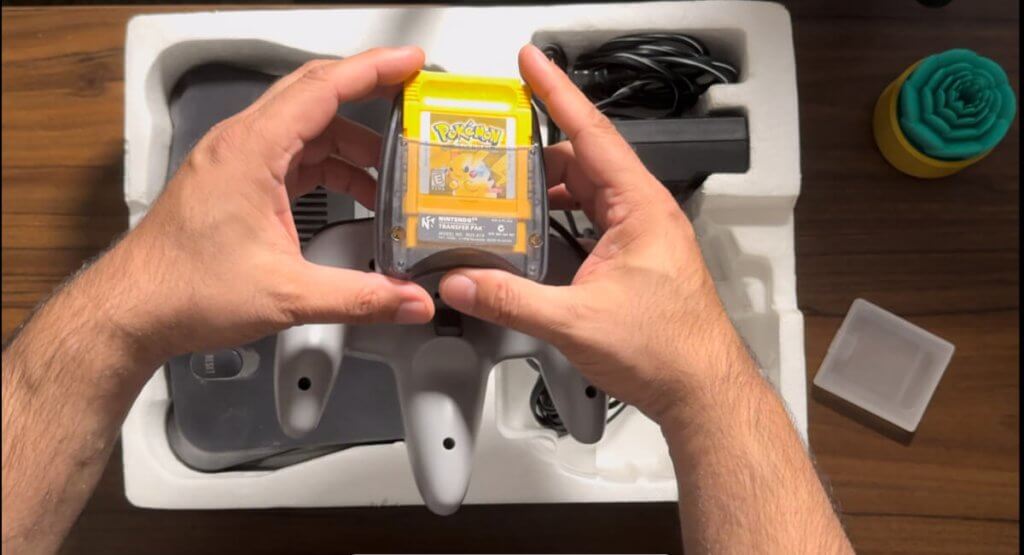
Not only did this unlock the ability to play your Game Boy Pokémon games on the big screen, but you were also able to battle your friends or the computer in full 3D battles. If you didn’t own the Game Boy games, you could still use rental Pokémon to battle. In 2024, there are few ways to emulate this childhood experience on modern devices.
Nintendo Switch Online
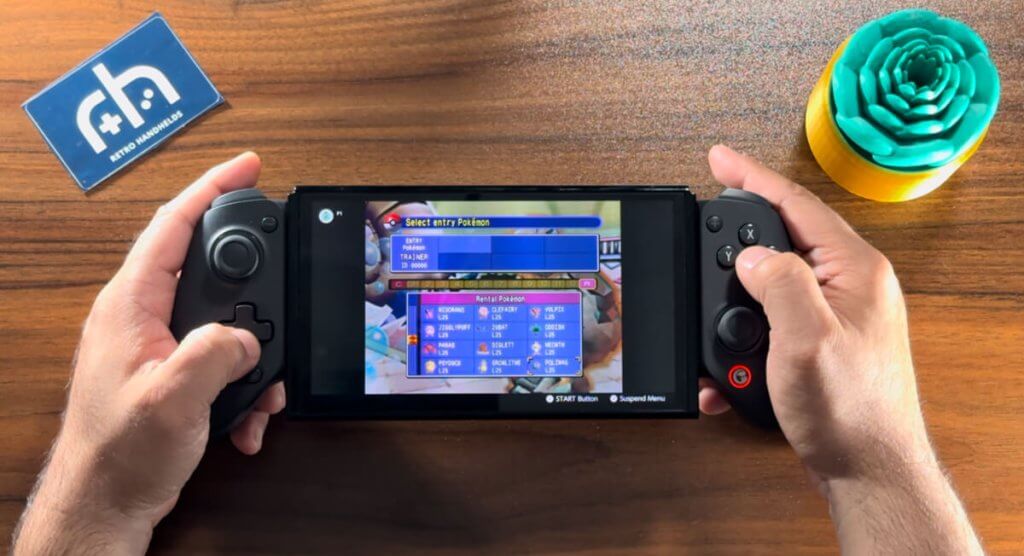
On the Nintendo Switch, you can subscribe to the Switch Online Expansion Pack. Then, the Pokémon Stadium games will become available to you through a series of N64 titles Nintendo makes available to subscribers. As long as you cough up that $50 premium per year, you will be granted the privilege. There is currently no way to import Pokémon into this game, however, meaning rentals only. Nobody wants that. We want to use our own poke, and we have retro handhelds! Therefore, let’s do this the right way!
DISCLAIMER!
You will not be able to use the GB Tower function in the Pokémon Stadium games. If you try, you will get an error and will need to reset the game. Thankfully, you can still use the proper Game Boy cores in RetroArch to play the actual Game Boy games.
How to Emulate the N64 Transfer Pak in RetroArch
File Setup
In order to properly link an emulated Game Boy game to an Emulated N64 game utilizing the Mupen64Plus-Next core, You will need three different files:
- A ROM of Pokémon Stadium or Pokémon Stadium 2 in z64 format
- A ROM of a compatible game (Pokémon Red, Pokémon Gold, etc. This MUST be extracted. It cannot be a .zip)
- A save of the Game Boy game in .sav format (This is Important! If your save is in .srm, make a copy and rename it as a .sav)
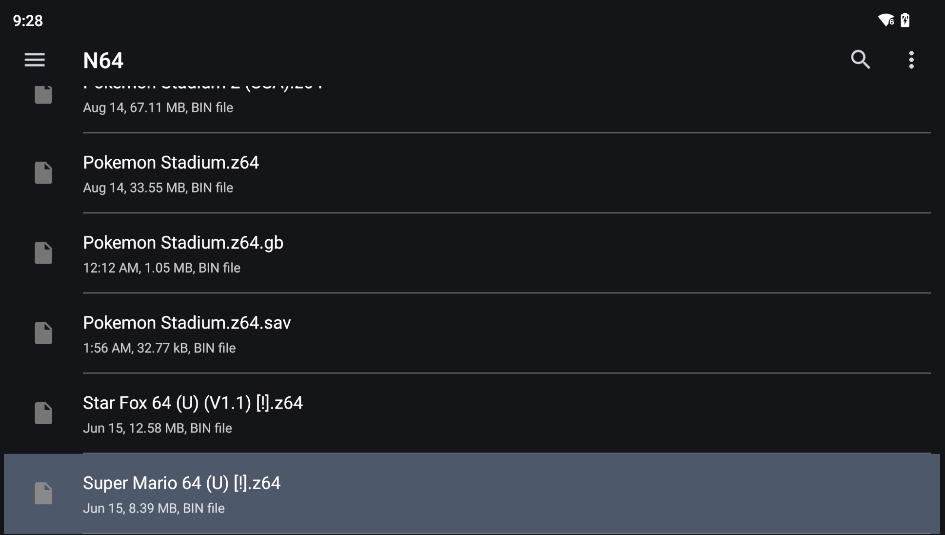
These saves need to be in the same folder, and we need to rename some of these files. For ease of use, I placed these files on the N64 folder of my SD card. In this example, we will use the original Pokémon Stadium. Additionally, these directions will also work with Pokémon Stadium 2.
- Change the name of the N64 ROM to “Pokemon Stadium.z64”
- Change the name of the Game Boy save file to “Pokemon Stadium.z64.sav”
- Change the name of the Game Boy ROM file to” Pokemon Stadium.z64.gb”
The files should look like the picture below.
Emulator Setup
Load up the Pokémon Stadium ROM in RetroArch using the Mupen64Plus-Next GLES3 Core. Then open up the RetroArch menu with the Pokémon Stadium game running using whatever hotkey you have set up. In the quick menu, we have to virtually “plug in” the transfer pak by navigating to Core Options –> Pak/Controller Options –> Player 1 Pak. Set this to “transfer”. Now it’s time to connect the N64 ROM to the GB ROM and save file.
- Close the running N64 game by navigating to Quick Menu –> Close Content.
- In the Main Menu, navigate to Load Core. Load the Mupen64Plus-Next GLES3 Core.
- In the Main Menu, navigate to Subsystems –> Load N64 Transferpak
- Navigate to where the files you renamed earlier are located.
- Select the renamed .sav file (in this example: Pokemon Stadium.z64.sav).
- Navigate again to Subsystems –> Load N64 Transferpak. You should still be in the folder you navigated to earlier. Select the GB ROM (in this example: Pokemon Stadium.z64.gb).
- Yet again, navigate to Subsytems –> Load N64 Transferpak. This time, select the N64 ROM (in this example: Pokemon Stadium.z64).
- One last time, navigate to Subsystems. There is a new option called “Start N64 Transferpak”. The three files you selected in earlier steps will be listed underneath.
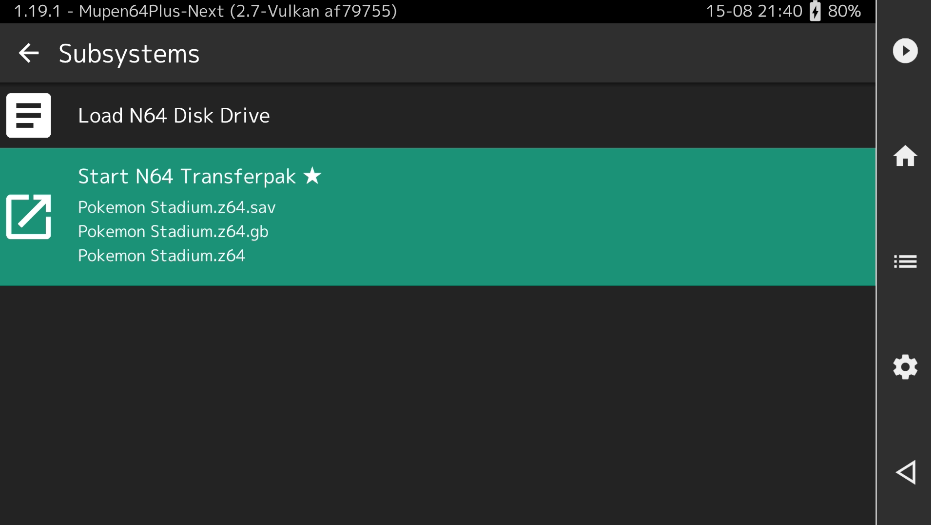
The game will start, and you will see your Game Boy save in the “Game Pak Check” section of the main menu. Then you can load up your Pokémon and start battling!
When you boot up your game the second time, RetroArch should automatically recognize the transfer pak and load your Game Boy save.
Android via M64Plus FZ Standalone Emulator
If you are on Android, it is actually MUCH easier to set up the N64 Transfer Pak with M64Plus FZ. You don’t even need to change any file names around. Additionally, this emulator will also work with .srm files, eliminating the need to keep your saves separate. If you play your retro games on an Android device, this is the better experience.
Emulator Settings
- Start by selecting the Pokémon Stadium or Pokémon Stadium 2 game. A menu will appear. Do not enter the game yet.
- Scroll down the side menu to “Settings”.
- (OPTIONAL) If your device can handle it, navigate to “Emulation Profile” and set this to “GlideN64-Very-Accurate”. This will reduce or eliminate any graphical glitches you may encounter in game, but at a cost to performance.
- Head back to the settings menu and select “Controller.”
- Scroll down to “Controller Paks” and set Player 1 to “Transfer Pak”.
- Scroll down a little further to “Player 1 Gameboy ROM” and set this to the location of your Game Boy game.
- Underneath “Player 1 Gameboy ROM” is “Player 1 Gameboy RAM”. Set this to your Game Boy game’s .srm or .sav file.
All you need to do is start up the game! Your Game Boy ROM and Save file will be recognized and you can play the game.

Finally, In the Pokémon Stadium or Pokémon Stadium 2 game, navigate to options and turn voice to “off”. You’ll thank me later.
Do you have fond childhood memories of the Pokémon Stadium games, or do you plan on giving these games a shot? Let us know in the comments below, and chat with us in our Discord!
You can see plenty of my other articles on this site, including an article where I talk about timeless games. Maybe Pokémon Stadium is timeless? Probably not.
Check out the video version of this guide!
This page may contain affiliate links, by purchasing something through a link, Retro Handhelds may earn a small commission on the sale at no additional cost to you.
