This article has been written and provided to us by RH community member Dan W.
Why Not Batocera?: Building better Steam Deck Emulation
Earning my Game Of The Month
This article is meant to be part guide and part a celebration of 3 of my favorite parts of the retro handheld gaming scene – tinkering, linux custom operating systems and the RH Discord Game of The Month.
I like tinkering with handhelds, nothing too major – soldering is way too far for example – but I like to feel that the handhelds in my collection are more than just an off the shelf item. I once heard a theory that by customizing an object you embed more of you in it, truly personalizing it, and while that has all the entrapment of spiritualism, it’s an idea I still kinda like.
I love the RH discord GOTM, because it’s truly one of the best corners of the internet, where the playing of retro games has itself become gamified, and where those of us with handheld collections are given a reason to pick them up.
And I like Linux retro handhelds because they “just work.”
The challenge I’ve given to myself is to find a way to “earn” my game of the month, through improving the gaming experience of a handheld which sits unloved on my shelf, and then using it to play through one of the 3 games selected for a particular GOTM.
A Love Letter to Batocera
I’ve often been puzzled by the way Batocera is viewed in the community. Many members of the community share my love of Linux based handhelds – on the whole they “just work”, whereas Android and Windows based handhelds often need emulators individually configured. My first positive Retro Handheld experience was on using 351elec, and like much of the community, I’ve dabbled with both ArkOS and JelOS, all options which have staunch followings within the community in a way that Batocera doesn’t. That puzzles me. While Batocera isn’t a perfect experience on all devices, it has a flexibility not present elsewhere – if you make a list of every device reviewed on the Retro Game Corps YouTube channel, more of them will run Batocera than any other operating system. Batocera also offers a degree of predictability in its release cycle – generally there are 3 new releases per year, each adding support for new devices and emulator improvements, whereas most other options have, at some part over the last 3 years, been rumoured to be retired by the developers. While some options feel like a hobby, Batocera feels like it’s managed as a standard Linux Distro.
It also feels a little less po-faced than the alternatives. From the off Batocera feels like it has a degree of upbeat joy about the user experience, ranging from the 80s-style menus to the love-it-or-hate-it intro animations and music. If it doesn’t annoy you, it brings a smile to your face.
But Batocera isn’t perfect, especially if you consider the Steam Deck experience. While there are guides to installing Batocera out in the wild, there are guides to setting up as well, and guides to enhancing Batocera, at the time of writing I couldn’t find a single “all in one” guide for designed to give build a better emulation experience for Steam Deck users. So my challenge to myself is to build a better Batocera on Deck, document my steps, and see if it will work as a GOTM device.
But Why NOT Batocera?
Batocera is not yet a perfect experience on the Steam Deck. While you can play games from your Steam Library on Batocera, they need to have inbuilt Linux compatibility, and game which play using Proton won’t work on Batocera. Also currently there aren’t any TDP controls, meaning you have less control over battery life. Additionally, 64GB deck owners probably won’t be able to spare their Micro SD card slot as they’ll need it for Steam OS storage.
Ingredients
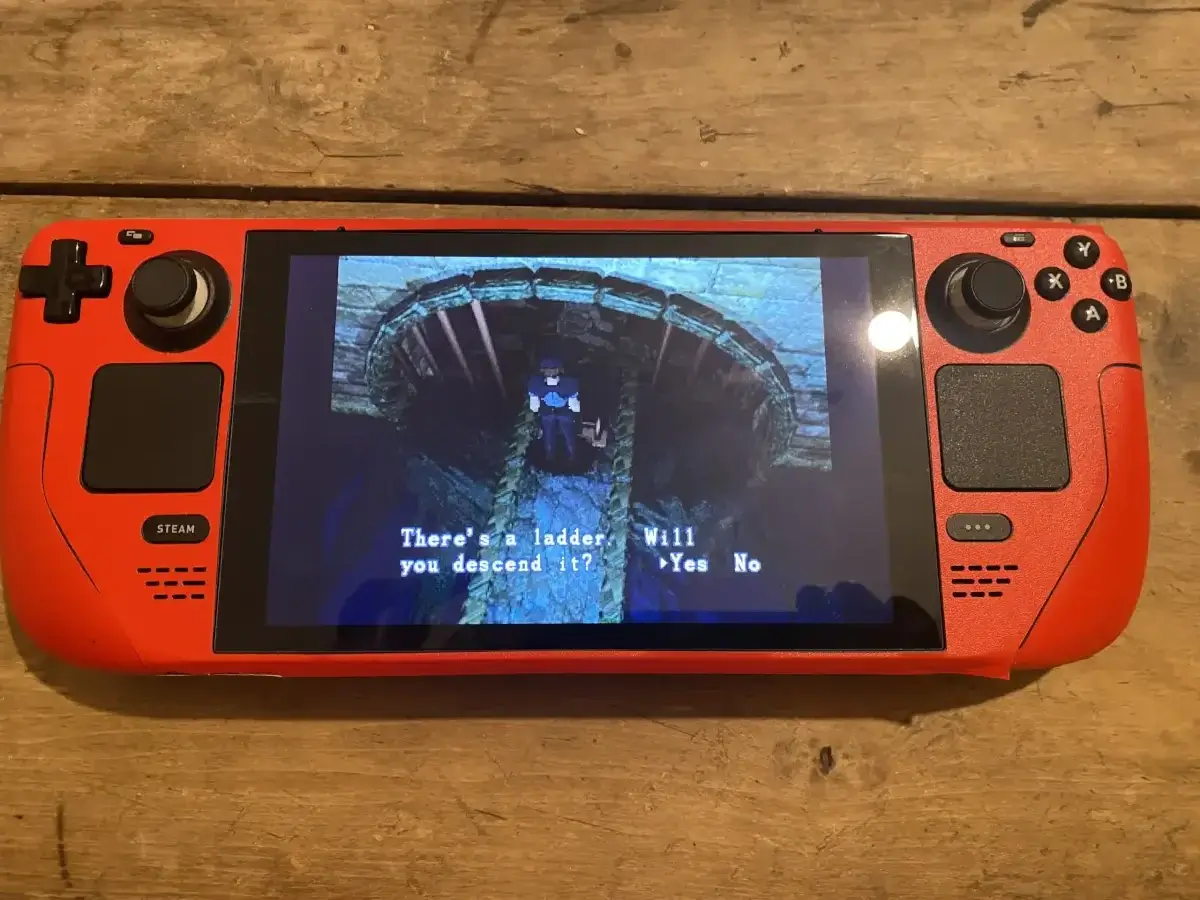
The patient is a 64gb Steam Deck with the SSD upgraded to 256GB, and a red decal skin terribly applied.
Assistance was given by a Large SD card (I used a 200gb) and a USB keyboard with an adapter to plug it into the deck.

Initial Set Up:
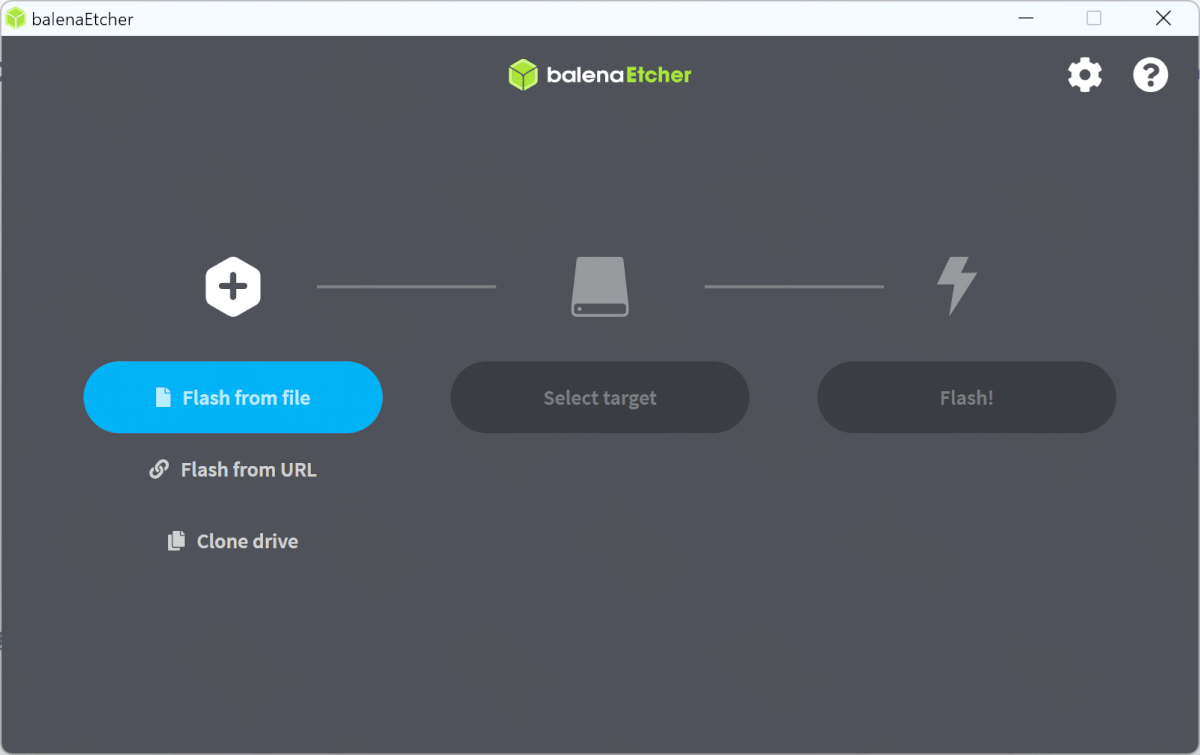
I downloaded the Batocera image for the Steam Deck from the Batocera website – https://batocera.org/download – and burned it to an SD card using BlanaEtcher – downloaded from https://etcher.balena.io/#download-etcher – and anyone who’s previously downloaded a custom OS for a retro handheld will know the steps off my heart.
For those that don’t, it’s as simple as:
⦁ Downloading the above files and installing BalenaEtcher on your PC.
⦁ Opening BalenaEtcher and selecting “Flash from File”
⦁ Navigating to the location of your Batocera Download, selecting it, and clicking “open”
⦁ Back in the BalenaEtcher Menu, selecting “Select Target” and choosing your SD card
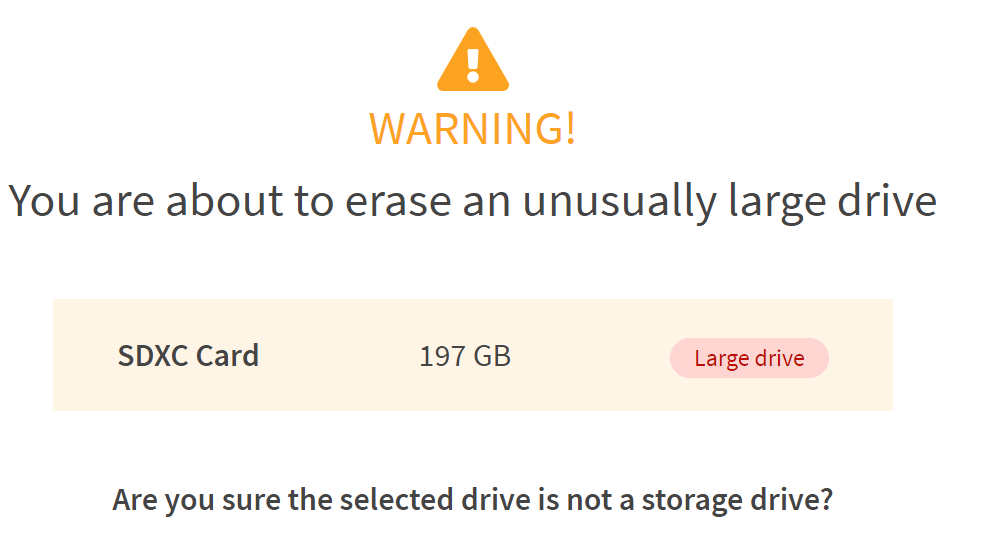
⦁ Confirming the destination, if you’re using a large SD card like I am.
You’ll boot into Batocera to allow it to do the initial set up, then switch off, and remove the card, in order to transfer your games. To do this:
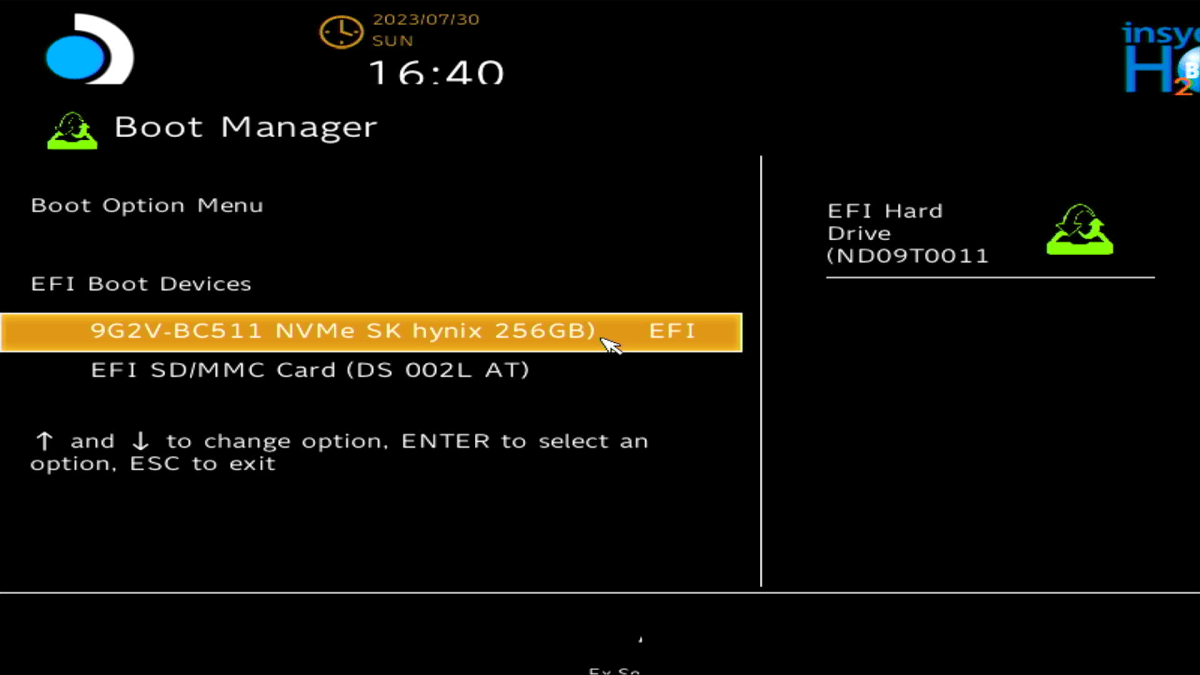
⦁ With the Deck switched off, hold down the Volume Down button and tap the power button, this will allow you to enter the boot menu for the deck.
⦁ Once in the boot menu, use the joypad and the “A” button to select your SD card
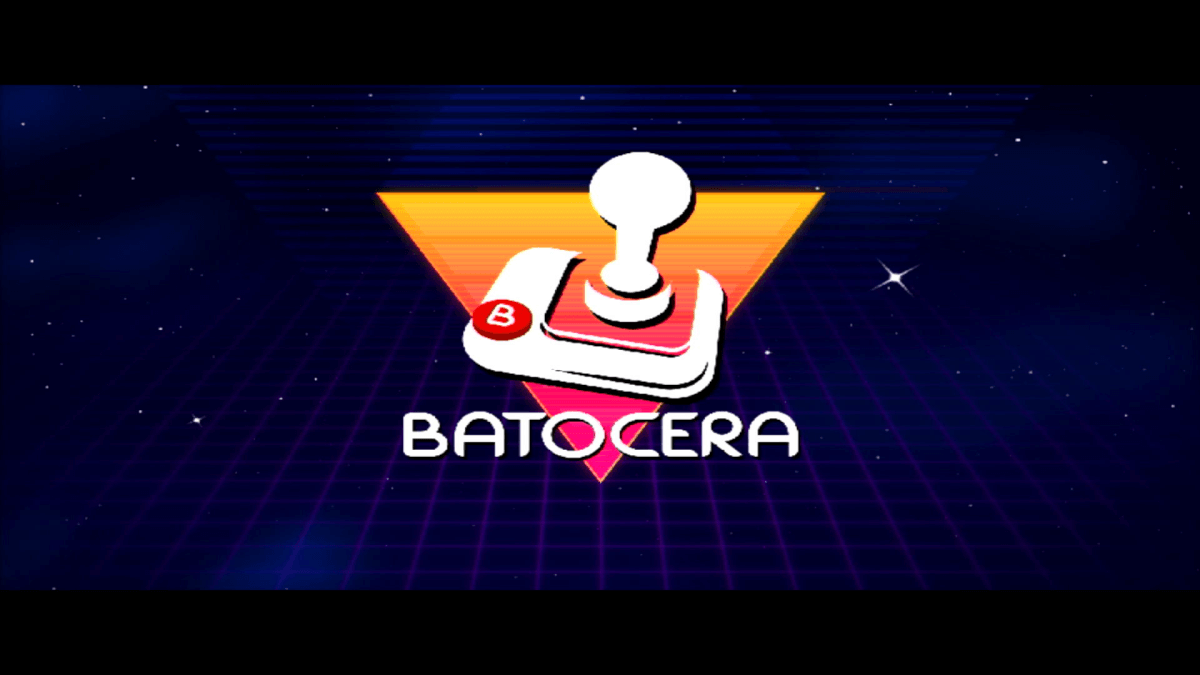
⦁ Wait for a bit while Batocera repartitions the SD card and sets itself up – you’ll know it’s finished when the intro animation and music start. These aren’t to everyone’s taste, and I’ll explain how to switch them off later.
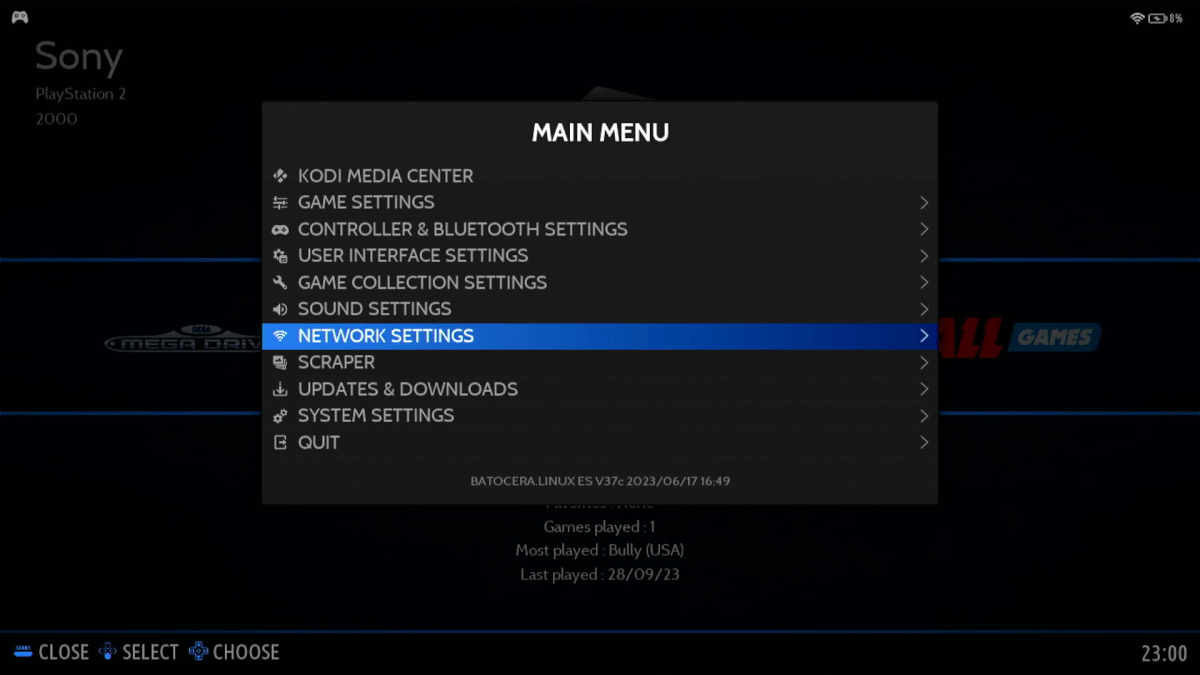
⦁ Connect the Batocera Steam Deck to a wifi network. To get to the main menu, press the start button (this is the button with the three vertical lines next to the X button), after that:
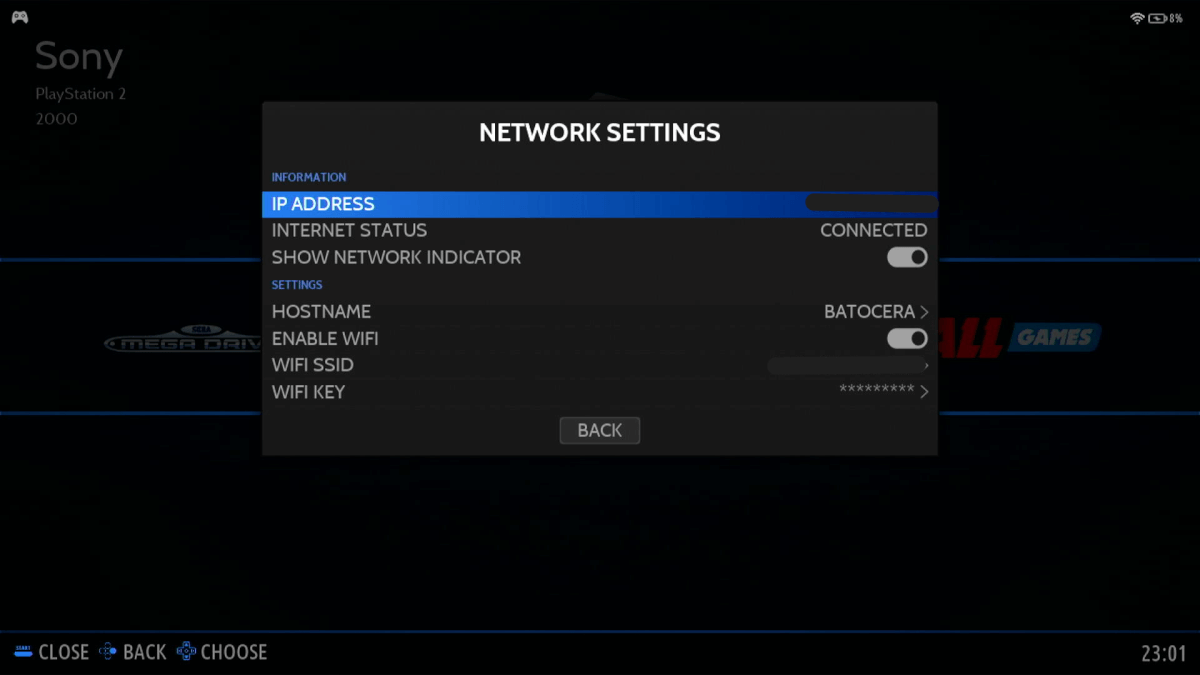
⦁ Select Network Setting -> enable Wifi
⦁ Wait a Wait for a little while while the deck scans for wifi (maybe up to 2 minutes). In the worst case scenario, a reboot will be required.
⦁ Select WIFI SSID (the SSID is the ServiceSet ID – the name of the wifi network) – from here the correct wifi network can be selected, and the password entered on the keyboard.
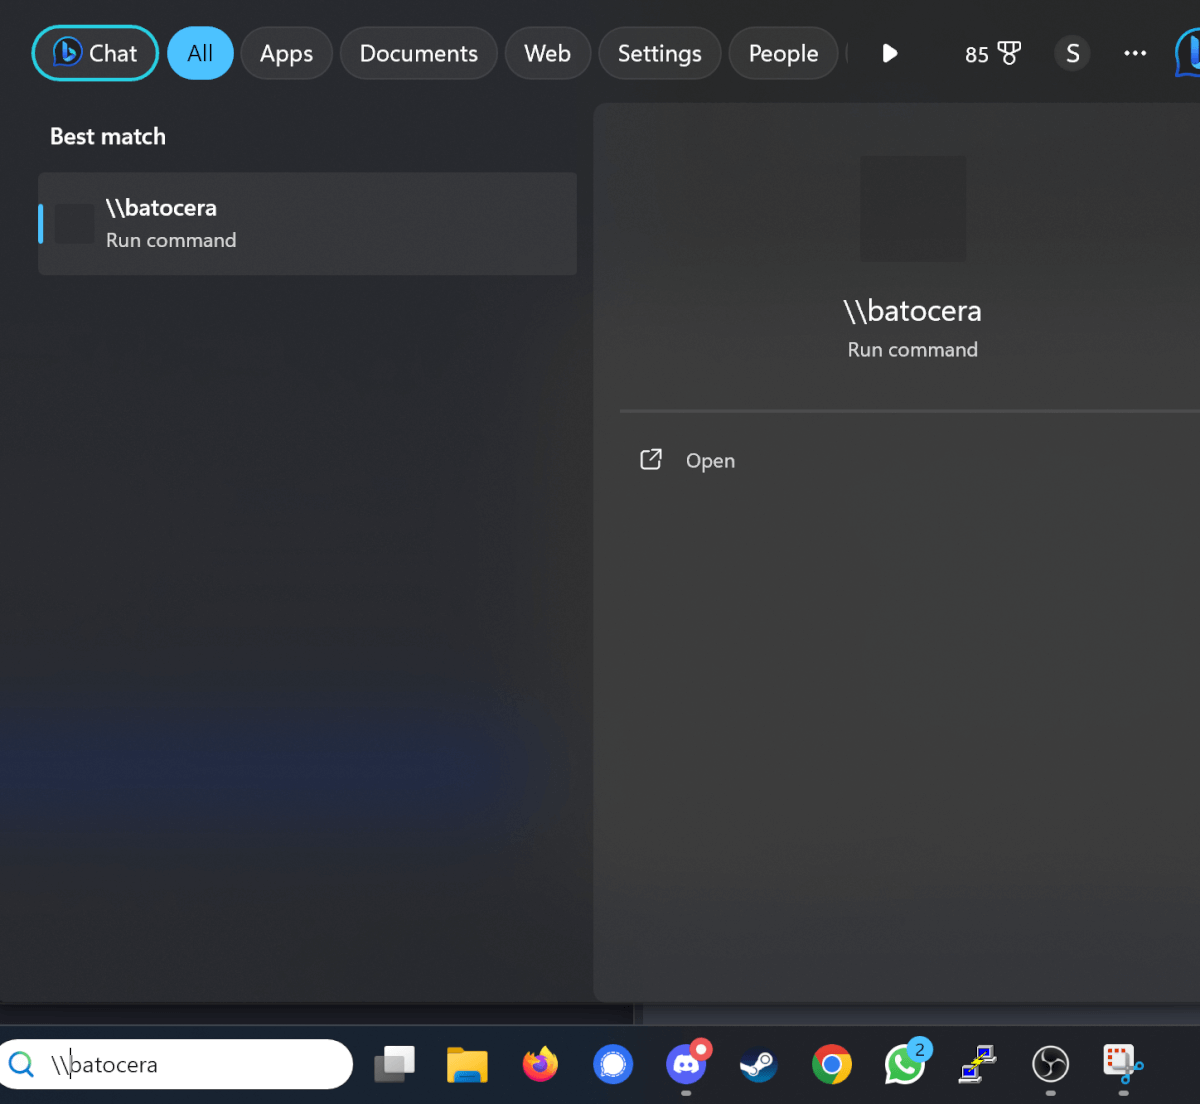
⦁ A feature of Batocera is that, when connected to a WiFi network, it will allow other devices on the same Wifi network to transfer files wirelessly.
⦁ A windows device can connect to the deck when “⦁ \\batocera” is entered in the search.
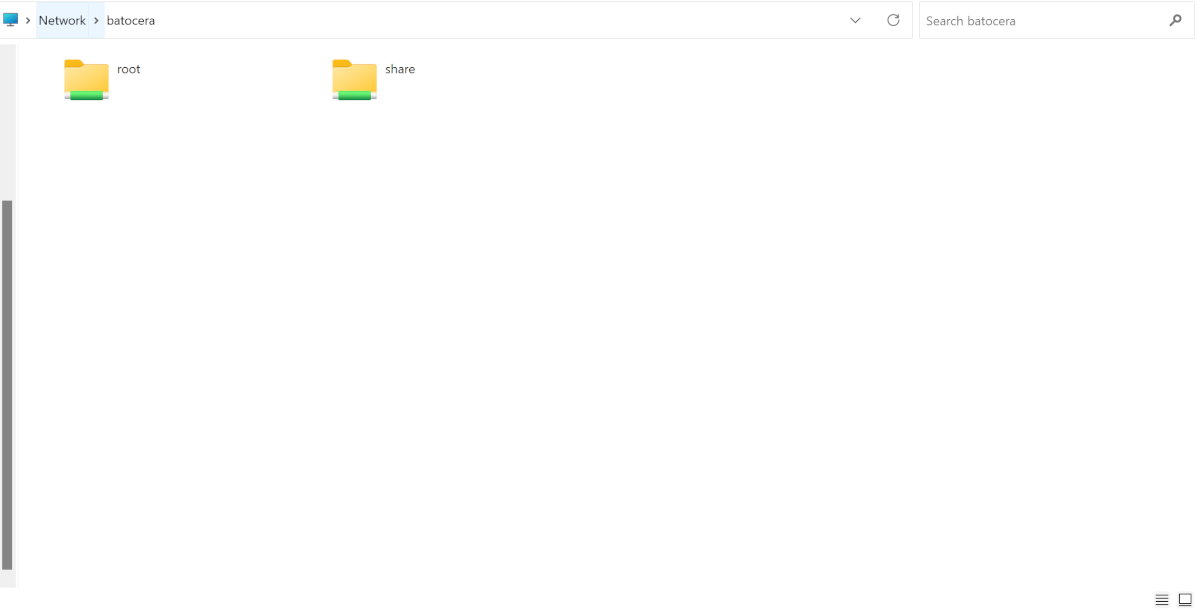
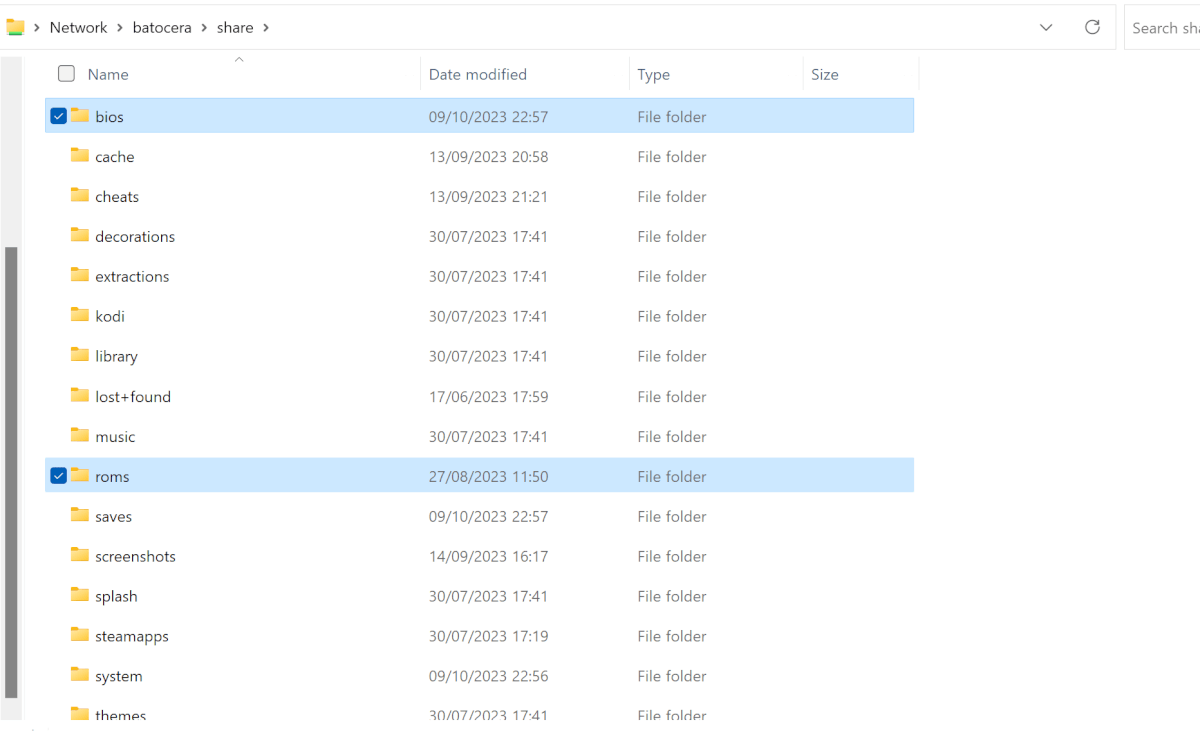
⦁ The first screen should show two shares – “root” and “share” – all the relevant files will go into “share” .
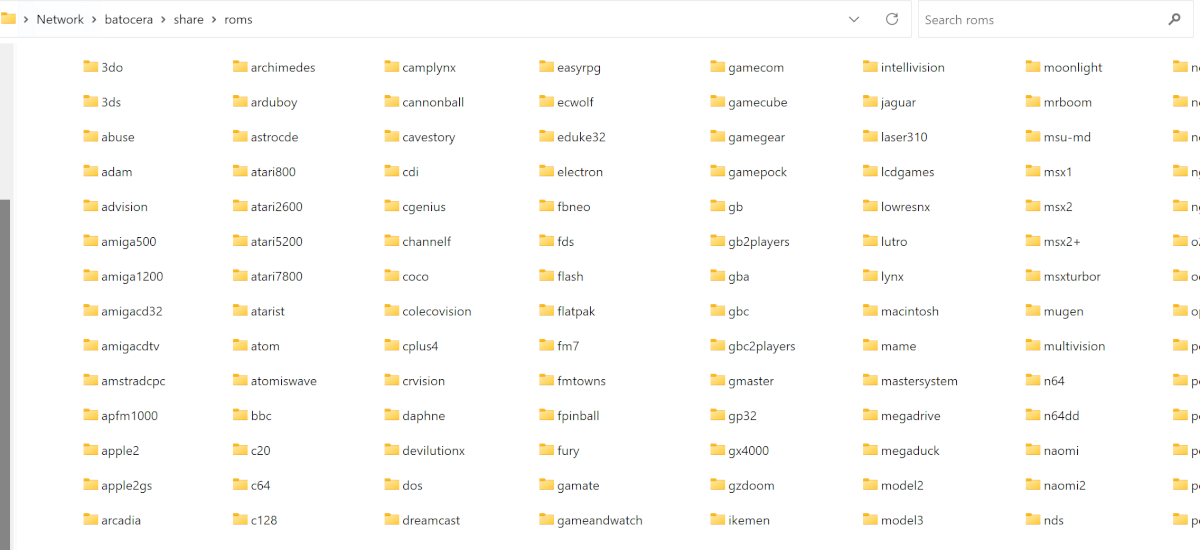
⦁ Inside Share, the File structure should be easy to follow, Bios files go in the Bios Folder, and roms go in the relevant part of the roms folder. GameBoy roms go in the GB folder, and PlayStation Roms go in the PSX folder.
Once the file transfer is complete, Batocera will need to update the game list. This can be achieved either through a reboot (accessing the boot menu by pressing Volume Down during boot) or by manually triggering by pressing the start button (the button with three horizontal lines) and going to Game Settings and selecting Update Game List
Enhancement 1 – A Proper Boot Menu
After the initial setup, we’re left with a Steam Deck which can boot into a retro-focused environment, but which needs us to hold down the volume key during boot up, and that’s not ideal. The Steam Deck allow users to choose the primary boot device, but if we did that, all it would mean is that we’d need to hold down the volume key if we wanted to access SteamOS to play PC games, and neither option would strike me as part of a definitive Batocera experience.
In order to get the ability to properly select which environment I want at boot up, I’m going to install a boot menu option I found from https://www.youtube.com/@10MinuteSteamDeckGamer/
The menu option is called Clover and there’s a relatively simple script available to install it from the Steam Desktop, but requires the typing text into the command line. While it’s technically possible to type in the commands using the Steam Deck’s virtual keyboard, it won’t be a pleasant experience, and anyone who has access to a Steam Deck dock, will have a better experience than I did, chaining cables and adapters together.
The process to install Clover is:
⦁ Make sure the Batocera Micro SD card is in place
⦁ Boot into the SteamOS and then access the Steam desktop
⦁ Make sure you’re connected to wifi
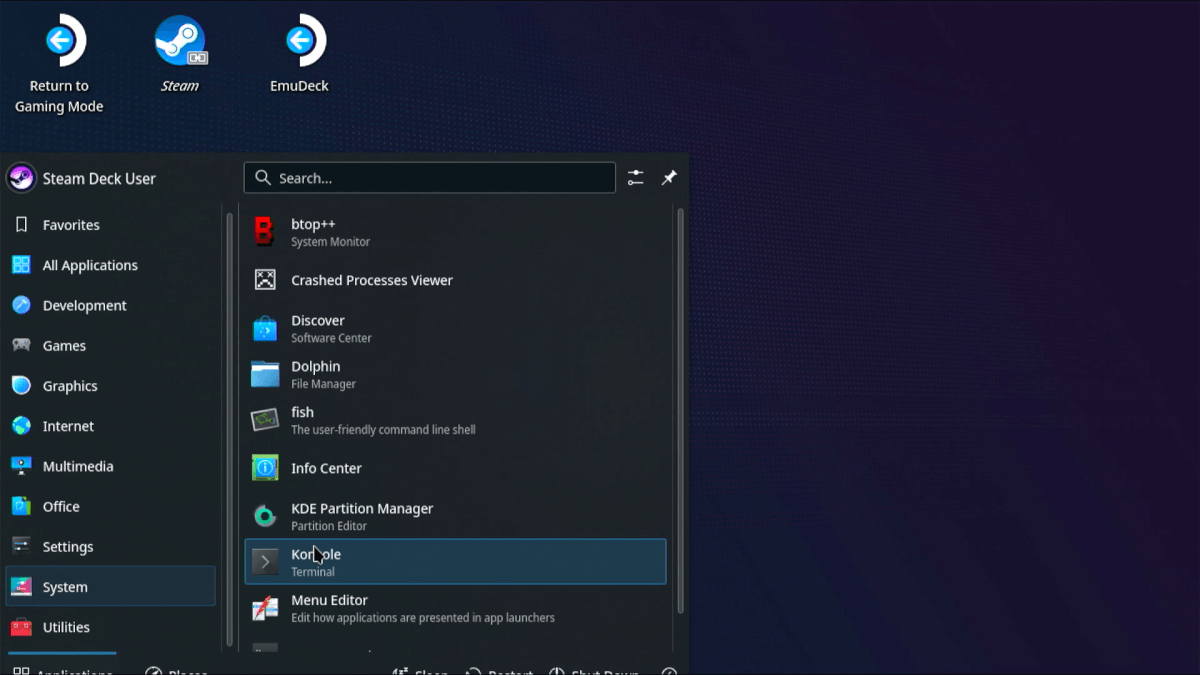
⦁ Open the Konsole terminal
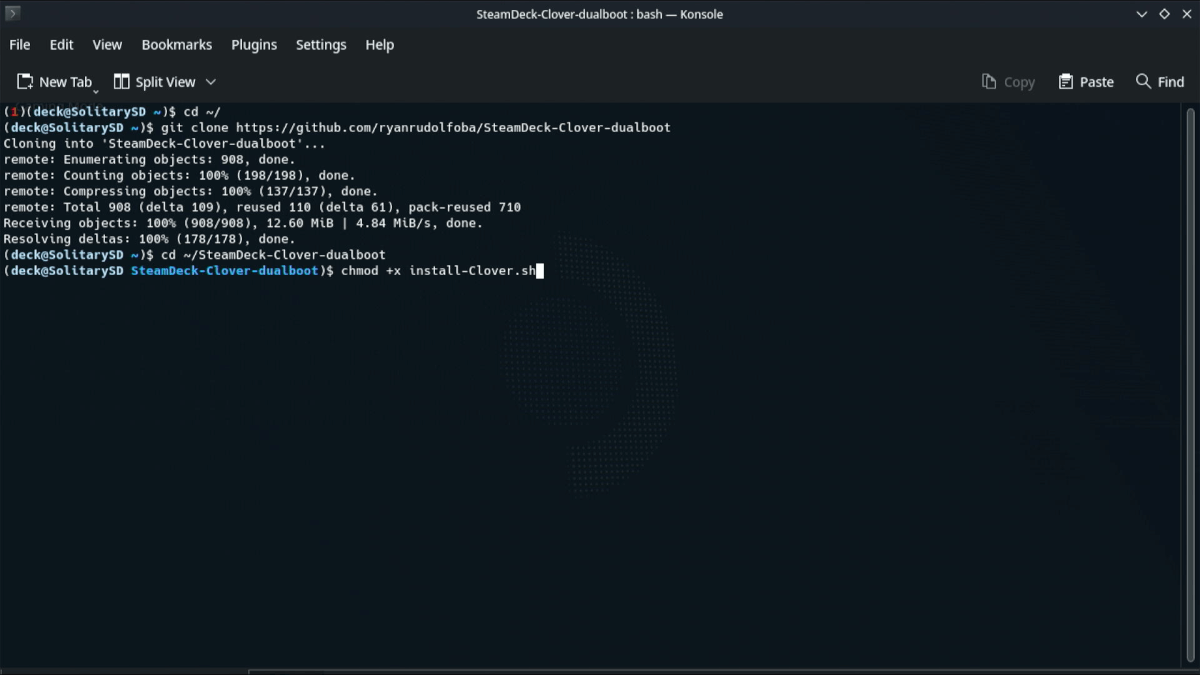
⦁ Type the following 5 commands in, pressing return after each line
⦁ cd ~/
⦁ git clone https://github.com/ryanrudolfoba/SteamDeck-Clover-dualboot
⦁ cd ~/SteamDeck-Clover-dualboot
⦁ chmod +x install-Clover.sh
⦁ ./install-Clover.sh
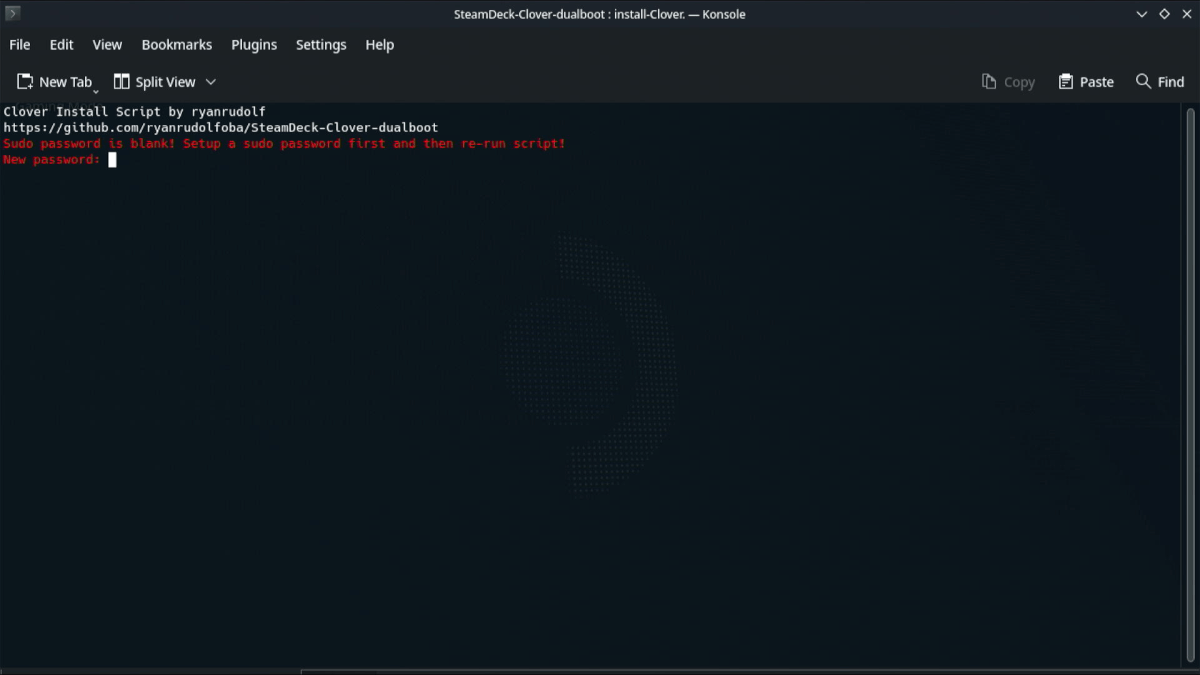
⦁ At this point, the install script will run, check whether you’ve got a sudo password set (a sudo password is the password for the linux root admin account) and then run it if you have. If, like me, you’ve never touched the Steam Deck’s root account, the script will ask you to set a sudo password, and then exit. Do as it asks and set the password.
⦁ If you had to set a sudo password, the command to trigger the script will need to be rerun – ./install-Clover.sh – to do this you can tap up on the up arrow on the keyboard to select the previous command, so tap that button then hit return to run.
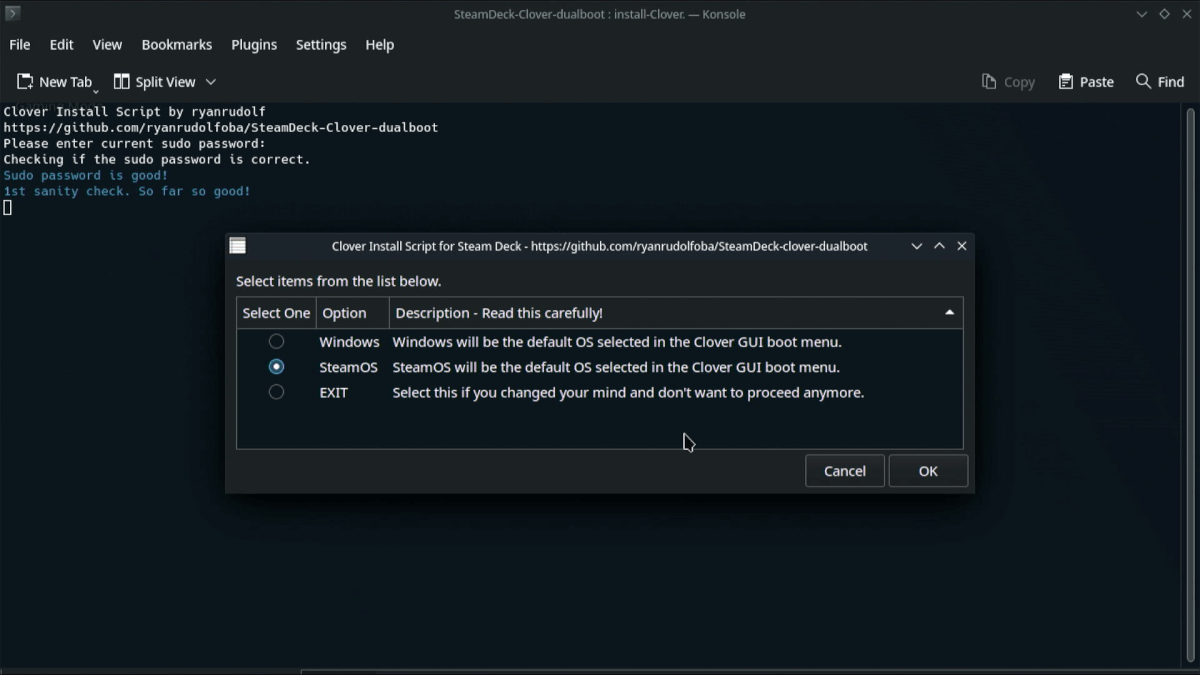
⦁ The script will ask you to enter your (possibly newly created) sudo password and then ask which OS you want to be the default – I chose SteamOS
⦁ The script should now start running automatically and you can sit back and watch.
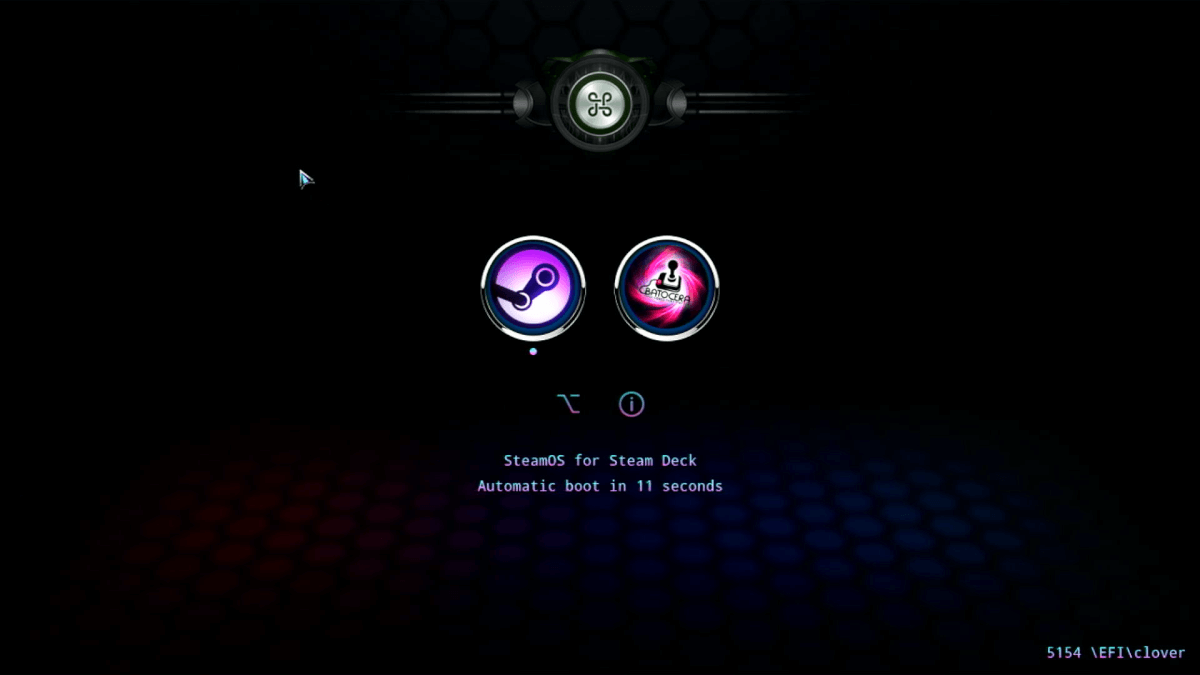
After completion, whenever my Steam Deck is switched on, it will now show me the clover menu where I can select which environment I want to boot into. If I ever wanted to install windows on my deck (maybe with a bigger SSD), clover will automatically detect the OS and offer that as an option too, making it an easy triple boot machine.
(Clover has its own surprises, and sometimes the background picture on the boot menu may change)
Enhancement 2 – Emulating the Nintendo Switch
Batocera doesn’t ship with inbuilt support for Nintendo Switch emulators, this is because Batocera considers its scope to be abandonware and considers the Switch to be a current technology.
While my current unit has a terribly applied red decal, somewhere in my house there’s a replacement, Switch-themed skin I bought from dBrand, currently lost during a house move. When I find it and apply it, it would be pretty embarrassing if my unit didn’t play switch games. There’s a unofficial Batocera extension on github, available at https://github.com/ordovice/batocera-switch, and I’m going to use the convenient installation script available on the github page to install, and this installation script should work on pretty much any Batocera installation.
To install:
⦁ Boot the Steam Deck into Batocera, maybe taking a moment to marvel at the newly installed boot menu
⦁ Make sure a USB keyboard is connected
⦁ Connect the Batocera portion of your Steam Deck to wifi – Batocera doesn’t share wifi settings with SteamOS, so you’ll have to reconnect
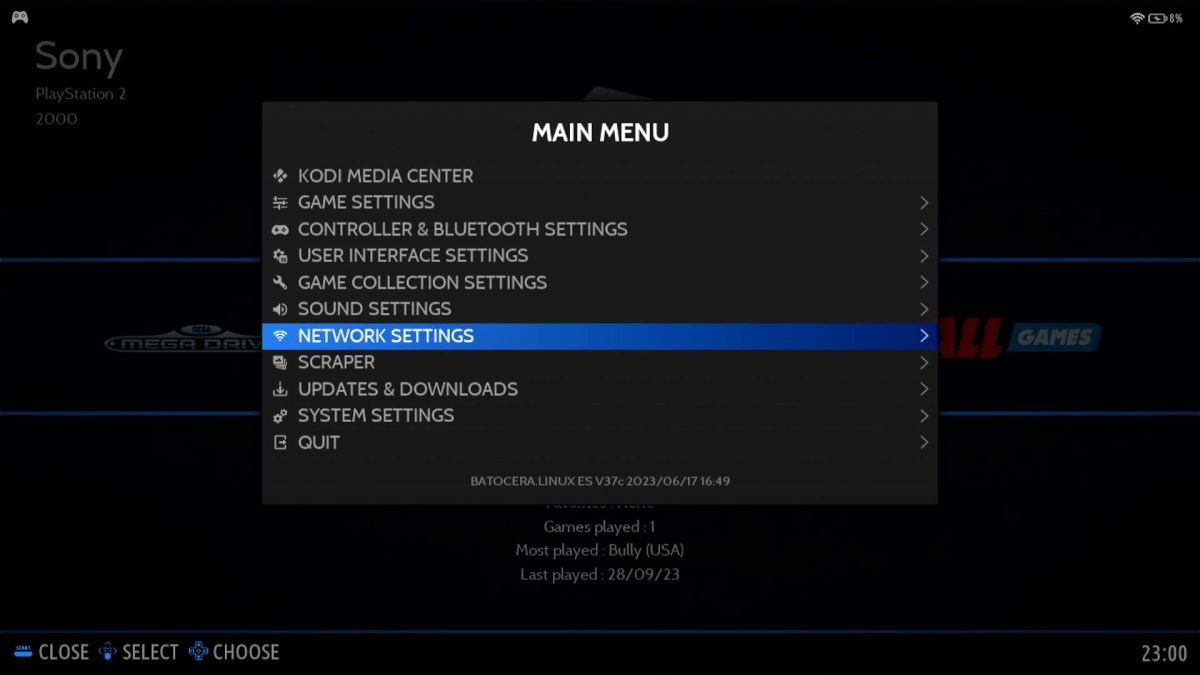
⦁ Press the start button (the button with three horizontal lines near the Y button) to bring up the Batocera Main Menu
⦁ Go to Network Settings
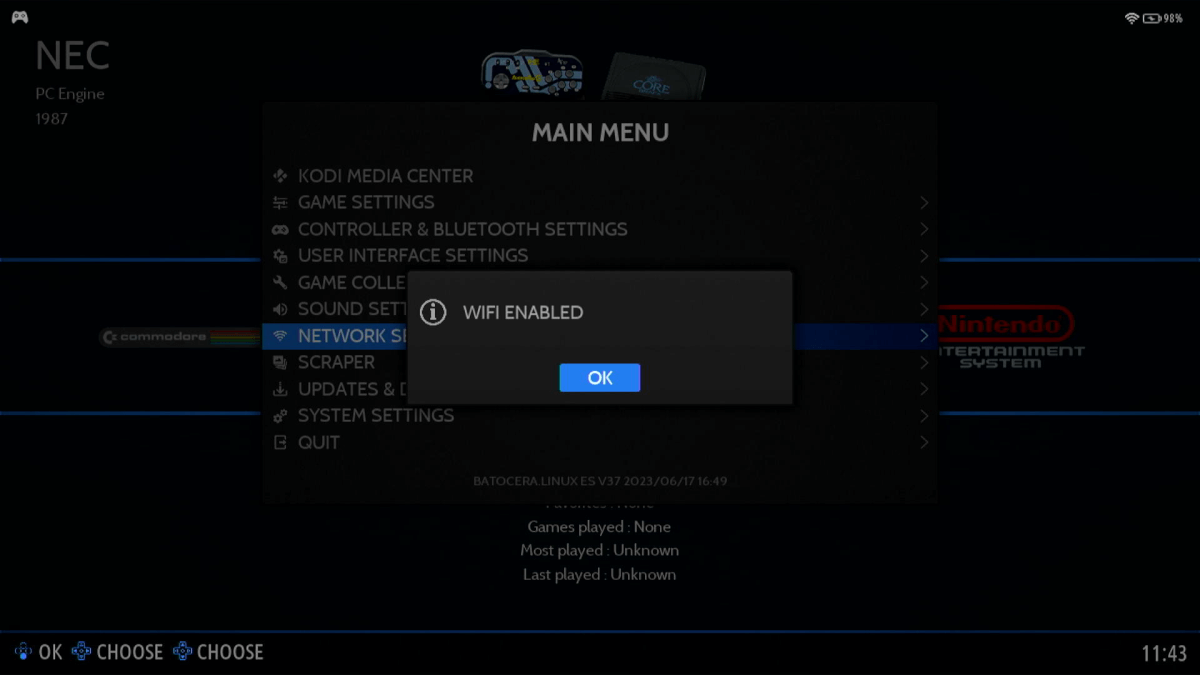
⦁ Select “Enable Wifi” to switch on the Wifi
⦁ Select Wifi SSD, and select your wifi network
⦁ Select Wifi Key and enter your wifi network’s password. The USB keyboard will help here, but I still have to select enter using the joypad and buttons
⦁ A message should come up saying “Wifi Enabled” – check you can see an IP address, if not there may be a typo in the password
⦁ Press B a couple times to get back into the initial Batocera screen, then press f1 on the keyboard to enter the Batocera desktop
⦁ Open the terminal app by pressing f4 on the keyboard
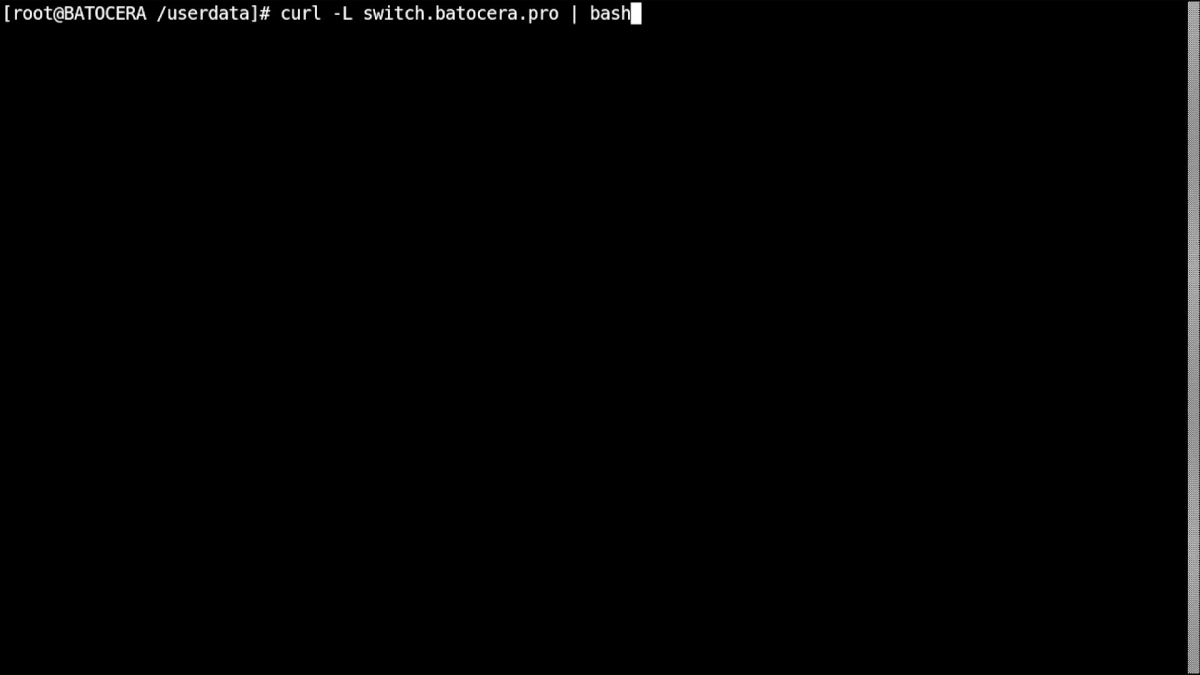
⦁ Enter the following command
⦁ curl -L switch.Batocera.pro | bash
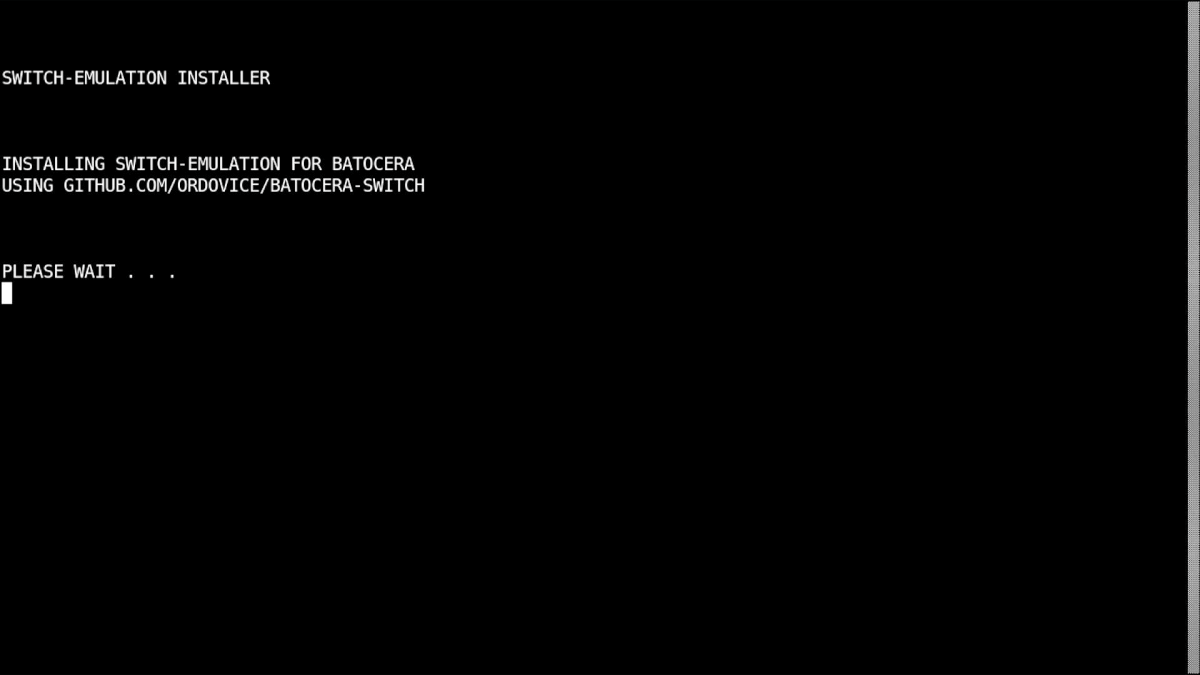
⦁ Sit back and relax as both Yuzu and Ryujinx are installed
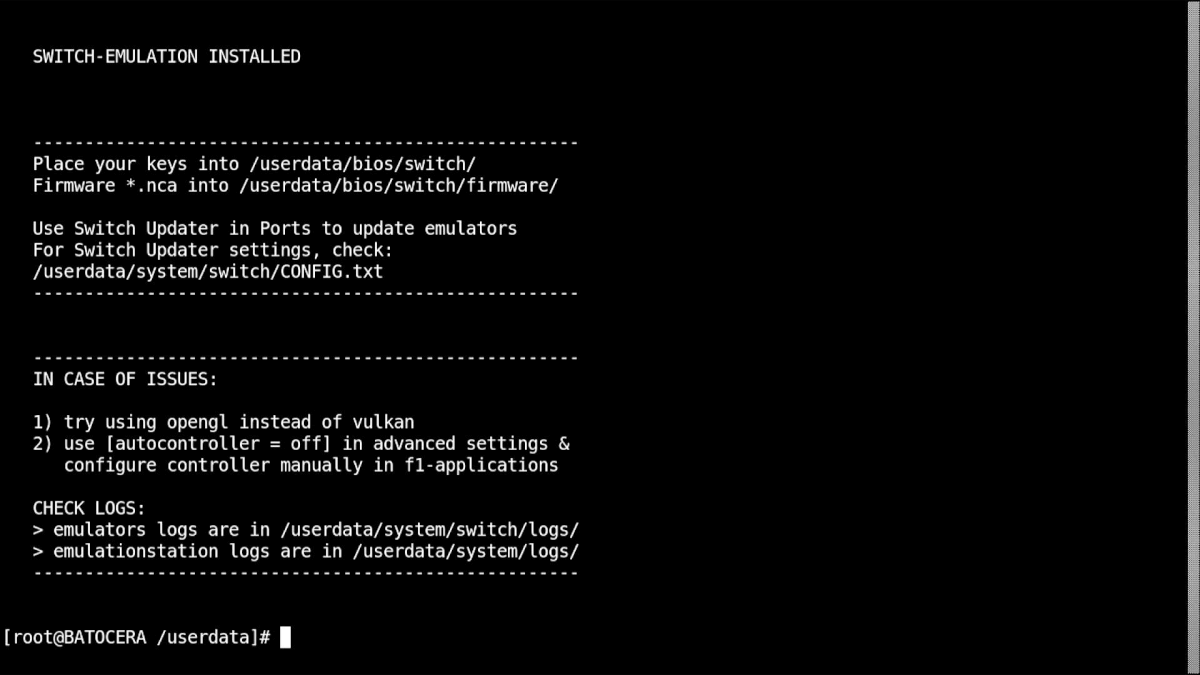
⦁ When the script is complete, type “exit” and hit return to exit the command line, then press Control+Q to go back to the main Batocera screen
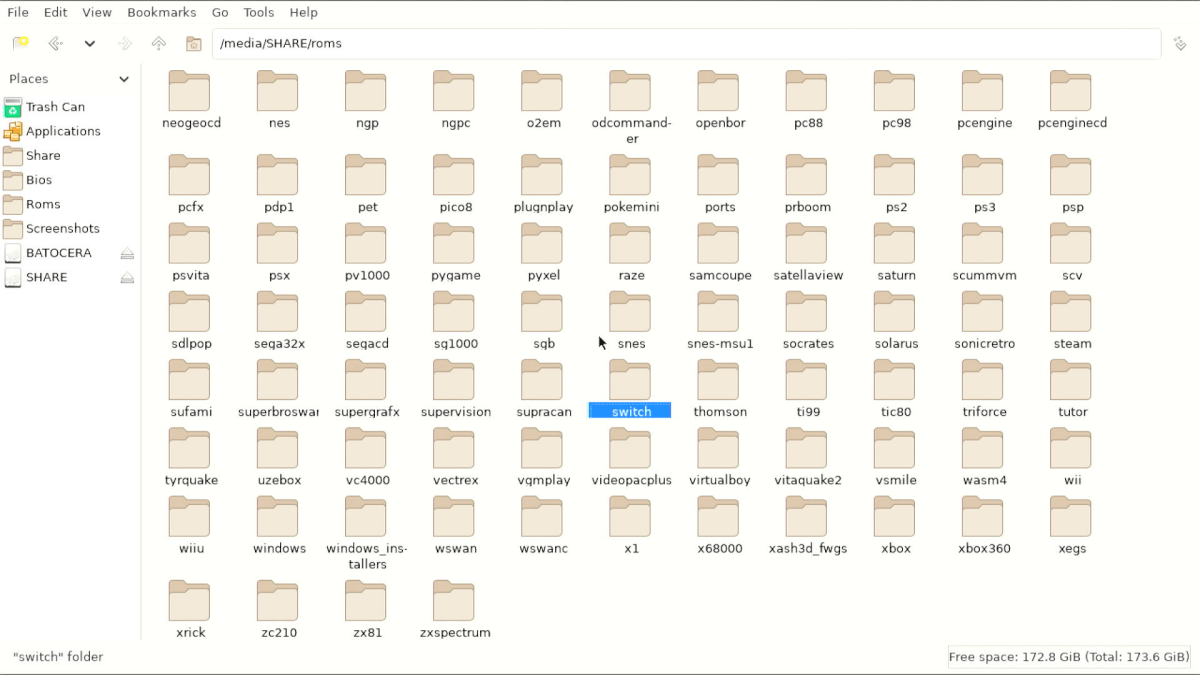
The script won’t just install the Switch emulators, it will add folders to the game partition for Switch. We can switch off the Steam Deck, eject the SD card, and put it back in a PC, and we can see a new Switch folder. Switch games go inside this folder, and the prod.keys, title.keys and firmware go in the Bios sub-folder (although the firmware isn’t needed if you’re only using Yuzu as an emulator)
Again, if there are any issues with the games not showing up, as before, press the start/three dot menu, then choose Game Settings -> Update Game List.
Enhancement 3 – Amending the Boot Animation and Music
This one’s purely a personal decision. While I dearly love the warm embrace of the Batocera interface, I’m not someone who enjoys the intro music, especially if I boot up my Steam Deck somewhere public, and I don’t have the chance to mute it before the music hits. Luckily Batocera lets you configure the start up intro to your heart’s desire.
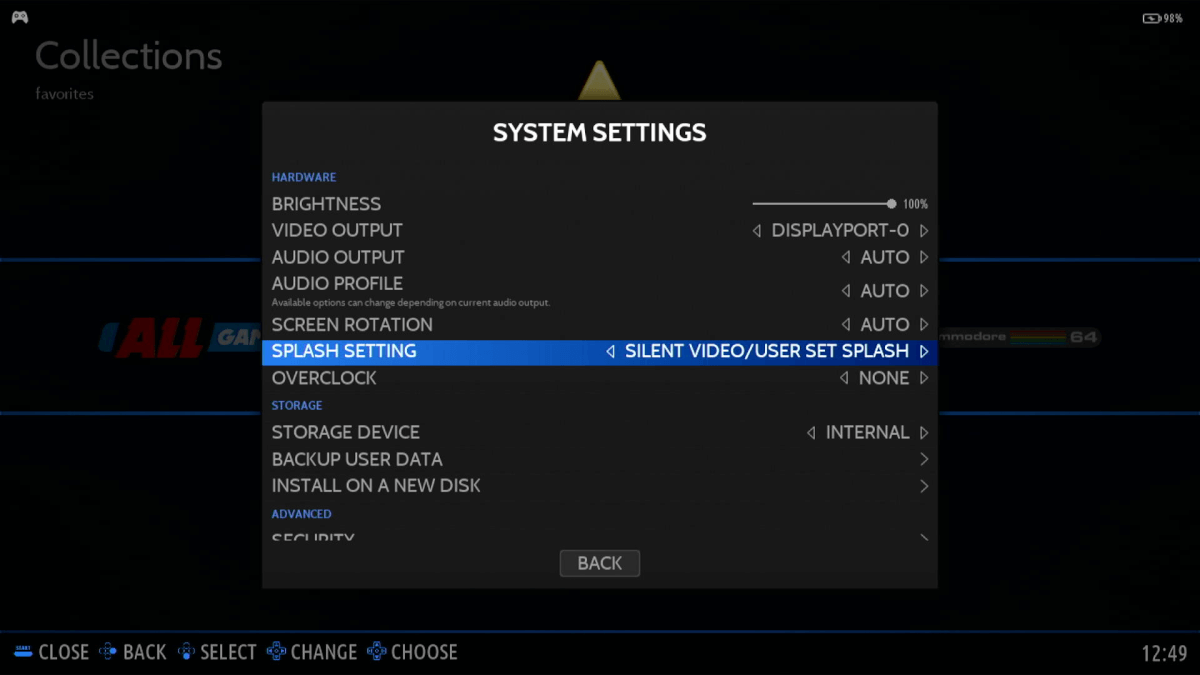
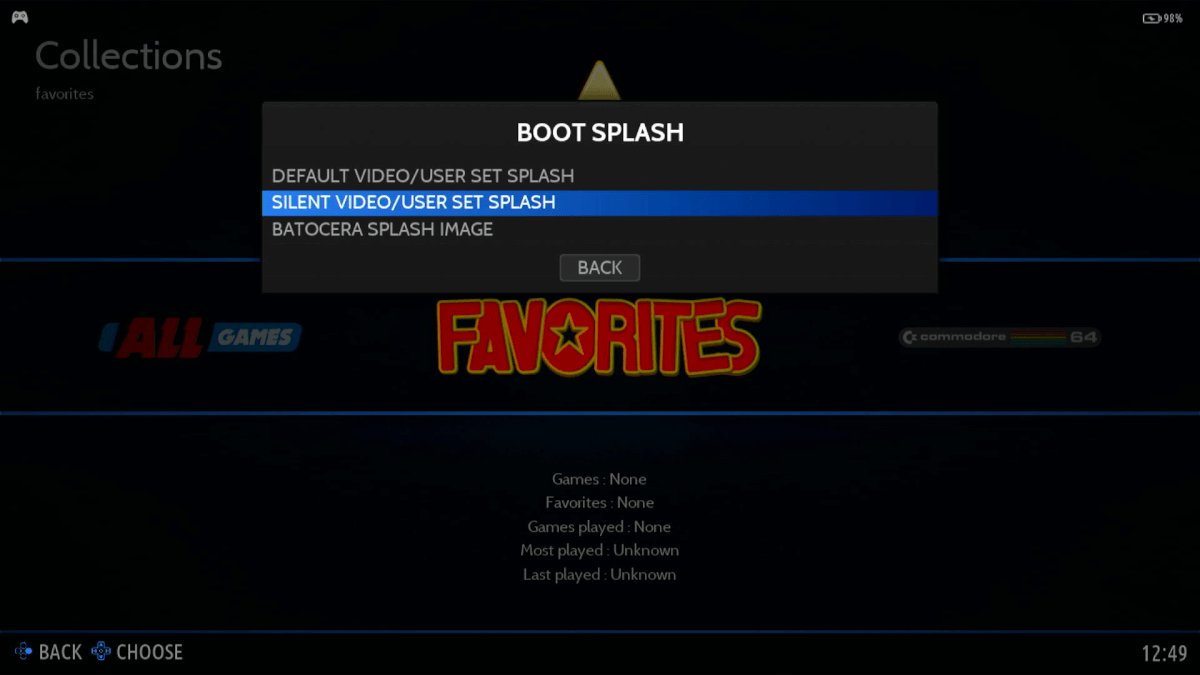
The Batocera options are accessible from the main Batocera menu – i.e. the menu that faces you after the boot up animation has finished. Just press start button (the three striped button on the Steam Deck near the Y button), then go to System Settings -> Splash Setting.
I don’t like the into music, but have no problems with the intro animation, so the setting I’m choosing to switch the music off, but leave the animation in place, by selecting “Silent Video/User Set Splash”
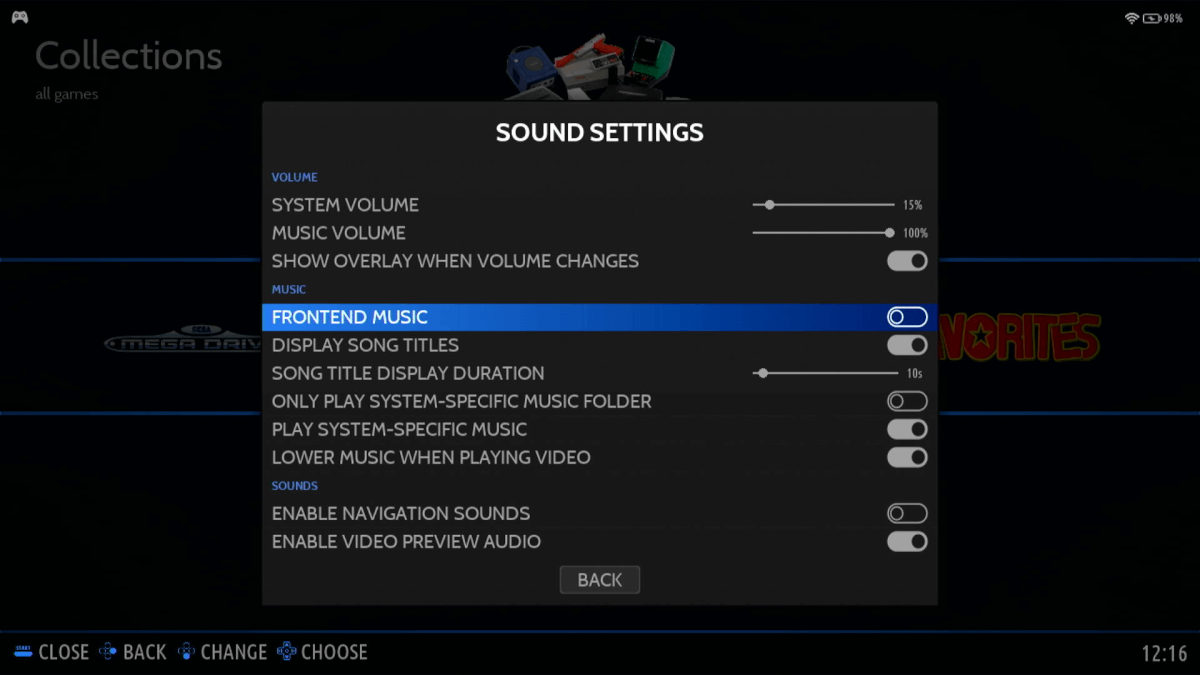
I also don’t always like the music playing in Batocera front screen,
There are more advance options, within command line of the Batocera desktop, which would allow you to pick any intro video and music your heart would desire, but I’m happy as we are, with just the muted default video.
Was it worth it?
At this point, as far as I’m concerned, I’m done. I’ve got a familiar and comfortable retro focused interface, able to play any console that came out before the PS3, and many games from beyond, all of which are able to be selected every time I reboot my Steam Deck. I find this a much better fit for me than EmuDeck, although obviously EmuDeck is a very good option for most people.
Can It Play Game Of The Month?
The games selected for this month’s RH Game Of The Month were: Doom (Multi-System) for the Pre-95 era, Resident Evil 1 (Originally PS1) for the 96-99 era and Fire Emblem: The Sacred Stones (GBA) for the 2000+ era.
Out of the three games, I chose to play Resident Evil, since the first RE game I played back in the day was Resident Evil 2. When a game is selected for GOTM, all remakes & remasters are eligible for playthrough, and a Steam Deck running Batocera should be able to play either the original release, the DS port, or the remaster running on the Game Cube.
Resident Evil was the first game to be commonly called “Survival Horror” and as a person who has been known to enjoy a good horror film, this one was my choice for the month. I ended up playing the Directors Cut version for the PS1. While the game’s plot or voice acting haven’t aged well, I haven’t found the controls anywhere near as frustrating as I’d been led to believe, and the dogs and hunters are still able to provide quality jump-scares. Playing it in 2023 highlights some of the flaws in the game, which wouldn’t have been so obvious in 1996, but on the whole the games does a good enough job of ramping up tension as the endgame approaches.
The most demanding game to make be selected for GOTM so far was Bully on the PS2, and the expectation within the community is that the natural barrier for GOTM games is the PS2/GameCube generation, at least for the next couple of years. This means that a batocera-ed Steam Deck should be expected to play any GOTM game for a significant while.
GOTM is open throughout the whole month, and completion of any game, demonstrated via the uploading of photos, earns you a point which can eventually be exchanged for RH merch.

Closing Up
Batocera to me reignited my appreciation for the deck. Before installing it, I had an idea of the Deck being a utilitarian handheld. Something that worked but without the joy of other devices. Being able to wrestle the retro side away from EmuDeck into an interface similar to that which I use on other handhelds, and being able to have a proper boot menu set up, means that I have a lot more warmth towards my deck than I had previously.
Basically, batocera helps make everything feel more Retro.
Further Reading
I was first introduced to Batocera through the Retro Game Corp YouTube channel, which is essential viewing for anyone taking their first steps into retro gaming – https://www.youtube.com/c/retrogamecorps
My knowledge of Batocera significantly increased after I started following Batocera Nation’s channel, their single focus is Batocera and they go into more detail, and test more devices than I ever will, and have videos showing how to get systems like Xbox 360 and Atari Jaguar running via Batocera on PCs with enough horse power – https://www.youtube.com/@BatoceraNation
Batocera itself is opensource software, supported through user donations. The website is here, and has a really good wiki https://batocera.org/
Details of the unofficial Batocera script to install switch emulators can be found here, include details of how to get support https://github.com/ordovice/batocera-switch
Clover, the multi boot menu for Steam Deck, is provided by ryanrudolf from the Philippines, and can be found here https://github.com/ryanrudolfoba/SteamDeck-Clover-dualboot
____________________________________________________________________________________________________
If this guide hasn’t convinced you of how awesome the capabilities of the Steam Deck are, check out our review right here on the website.
What did you think of this article? Let us know in the comments below, and chat with us in our Discord!

4 Comments
Great article. Something I will never do because, I dislike the deck and batocera.
OK, I recant my statement. Have a Deck on the way. Might try this out.
Good write up, thanks for putting it together!
Great article… i have an Steam Deck LCD that i don´t use anymore since i got an OLED, but now i will use it for Retro Games and Batocera!
Thanks for this tutorial!